September 27, 2008

Chattipathiri...

See this link of Images of Ramadan in the Boston.com for a humbling experience to make you thankful for every single blessing you have received whether it's good health or prosperity or a warm home or just food on the table. It's beautiful to see the variations and commonality of the different people observing the fasts.

I have been busy with exams and a bathroom renovation so haven't got the time recently to blog as many Ramadan food as I would have liked to. The one full bath in the house is now demolished and is a pile of ceramic and dust and its the hope of two shiny new bathrooms that keeps us going.
When I sit on the computer, there is a constant cacophony of construction noises upstairs and I wonder whether the ceiling will fall on us with the guys banging away carelessly. The ceiling even got a couple of small holes and a bolt poking through!! When the emphasis is how to get rid of the dust that seems to be everywhere now, selecting tiles and colors and whose house do we go to for today's shower, cooking tends to take a back seat. Even my dreams have tile patterns on them now.:)

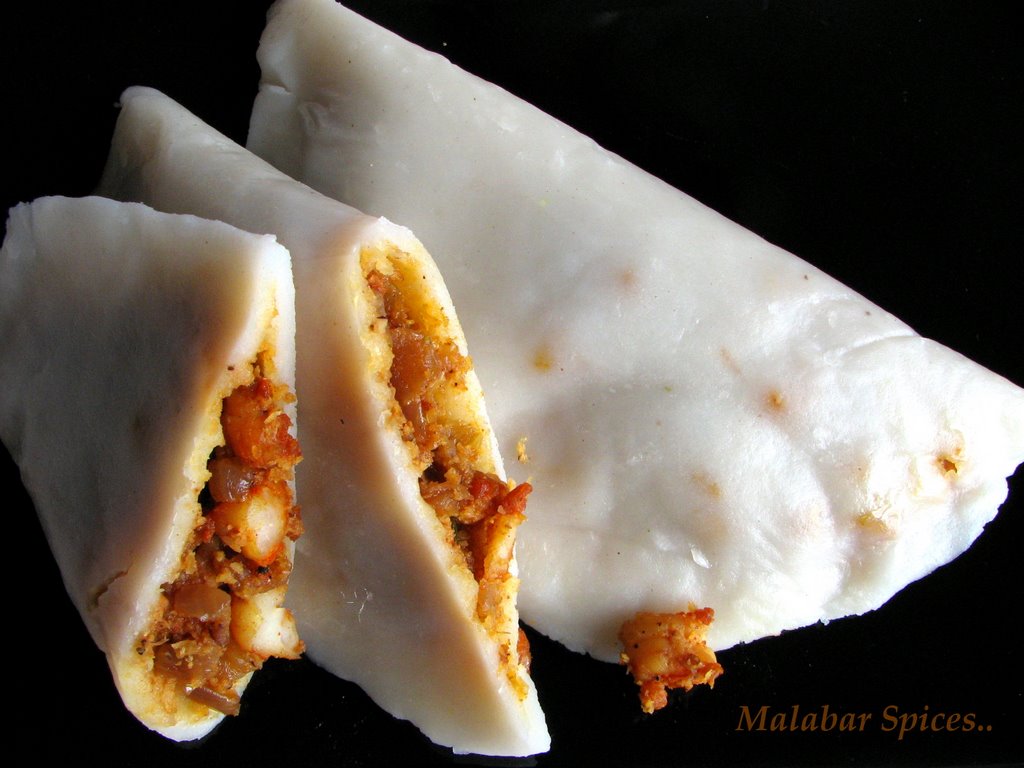
So I am posting a traditional recipe which was made sometime back and which was not posted earlier as I didn't have a cut photo for it.. it got served and finished before I could get the camera.
Chattipathiri, the original crepe cake made at a time when wood burning stoves were more common than ovens and baking powder. It's an unleavened cake made by layers of chapathis or rotis(similar to tortillas) interspersed with eggs, nuts and raisins, all submerged in a egg and milk custard which binds it together when baked. Decadent and definitely not healthy but so yum that you have to have it at the end of a fasting day..and on Eid and on festivals, and at salakarams, and on any special day..It just makes the day special just like having a cake center table makes you ask, "what's the occassion?"
It's similar to the Arab dessert Umm Ali and creamier cousin of bread pudding.
Chattipathiri is the epitome of Malabar cooking and making a good one is an art as well as matter or pride. It should have been on my blog a long time ago but I hesitated as this is definitely not a beginner recipe and needs experience to get it just perfect each time. There are so many things that can go wrong with the preparation and I am no expert to resolve all the issues. So try it and give me the feedback and if there are experts out there, send me pointers that I can add to this recipe.
Chapathis ready for layering...

Cashew filling...

Egg Filling...

Layering in a baking dish..

You Will Need:
For the chapathis( 6-7 layers):
All purpose flour-2 cup
Salt -a pinch
Water as needed to make dough.

For the filling:
Eggs-6-7
Milk-1 cup
Sugar-3/4 cup
Ghee +Oil-1/4 cup Ghee+1/2 cup oil.
Raisins-2 tablespoon
Cashew-2 tablespoon
Poppy seeds/Khus Khus-1 tablespoon
Cardamom-8 crushed into powder

Preparation:
1.Make the dough for the chapathis by mixing the water and flour and salt. The dough should be soft and pliable. Divide it into lemon sized balls and roll out the chapathis thinly. Heat a griddle/tawa and cook each chapathi on it. Cook each side for a couple of minutes on medium high heat. This is dry cooking and after each side turns opaque, it will start puffing up. At that stage, its cooked and the raw taste will have gone. A lot of people replace these chapathis here with ready made tortillas or chapathis but the final taste will then vary. The tortillas are slightly leavened so has a little too much thickness and the chapathis ready to buy are made of whole wheat so the texture changes. But you could start with those for ease of cooking. It still does taste good. Keep all the chapathis cooked and ready.

2. Egg Filling: Beat 2 of the eggs slightly with the 2 tablespoon sugar till the sugar dissolves and then add 1/4 tsp cardamom powder to it. Heat enough oil/ghee mix to scramble it lightly on medium heat till it form small clumps. Keep stirring while scrambling to avoid it from sticking to the bottom of the pan. Keep the mix aside.

3. Cashew filling: Heat 1/2 tsp of ghee/oil mix and roast the cashews, raisins and the khus khus in that order. Keep the heat low to avoid burning the cashews and the tiny khus khus. Just roast till a nice aroma comes through and remove from flame. Keep aside. You could add almonds also to this mix.

4. Now beat the rest of the eggs, milk and sugar and cardamom powder together with a whisk nicely. This is the custard base.

5. Assembling: Take a round baking dish which is the same size as the chapathi. Brush the base and sides of the dish with the ghee/oil mix. Dip a chapathi in the egg-milk custard and place it in the baking dish. Sprinkle some of the scrambled egg filling and the cashew filling all over it. Pour one teaspoon (or maybe 2 tsp) of the ghee/oil mix all over it. Place the next chapathi dipped in the egg-milk custard and repeat the process. When the last chapathi is placed, decorate the egg and cashews over it as this is the top of our cake. The egg and cashew filling should be distributed evenly amongst all the layers. Pour the remaining egg-milk custard over the layers, pressing down on the layers so that it absorbs the mix fully. Keep this aside for 15 minutes in the fridge to allow the chapathis to soak the liquid in completely.
6. Preheat the oven to 300 degree Fahrenheits. When you are ready to bake, pour the remaining ghee/oil mix over the layers and place in the middle rack in the oven.
Ideally this is cooked in a special cast iron or copper/bronze wide rimmed vessel. It is covered and cooked on a wood burning stove, with heat applied to it from the top by placing burning/smoldering coconut shells. That ensures even cooking from the top and bottom and the cake comes out in densely packed layers.
Cooking it in the oven here, the center rises prematurely leading to the custard running to the sides and then the custard cooks in that position, with the center layers devoid of too much of the custard. When it cools down, the center does flop back down and the layers merge, but still this is not perfect section of the cake. So there is this minor problem with the technique here but it doesn't alter the taste.
Bake for about 30-40 minutes, depending on the heat in your oven. Similar to cake, when it is cooked completely, a needle/knife inserted in the center should come out clean. Leave it uncovered and let it cool down completely before cutting. It only stays in the refrigerator and is good for 2-3 days at the most. A few seconds in the microwave just before serving will remove the frostiness of the refrigerator.

September 19, 2008

Mushroom Pepper Stir fry...


You Will Need:
White/Brown Button Mushroom- 1 pound
Onion- 1 medium sized one, sliced finely
Shallots-4-5 sliced
Green Chilies-3-4 slit coarsely.
Garlic-Ginger paste-1 tsp (can substitute with chopped ginger garlic)
Curry leaves- 1 sprig
Oil- 2-3 tsp
Coriander Powder- 1/2 teaspoon
Turmeric- a pinch
Pepper- 1 teaspoon or more
Lemon Juice- 1/2 tsp
salt to taste
Preparation:
Remove the stems and wash the mushrooms. Dry them and then slice them finely. Heat 1 tsp of the oil and add the mushroom and cook for 3to 4 minutes on high heat without adding anything. Keep stirring. This is to remove all the water from the mushroom. When the mushroom are wilted and shrink, remove from flame and keep aside.
Heat the oil in a cast iron pan and add the onions, shallots and curry leaves. When the onions start tinging brown at the edges, add the green chilies and then the ginger garlic paste or slices. Saute for a couple of minutes and then add the coriander and turmeric. Add the mushrooms, stir well for a minute and add salt as per taste. Stir and add the pepper and lemon juice in the end, just before removing from the heat. The pepper in the end gives it the zing, whereas adding it earlier will cook away the heat of the pepper.

September 15, 2008

Chemeen Ada/ Rice Pancakes with Shrimp stuffing

This is one of my earliest posts but since it is a Ramadan Iftar item, I thought of republishing it. This is also one way of making meen pathiri.i.e. without grinding the rice and using rice powder instead.

Ada, as most south Indians know, is a delicious preparation of sweetened grated coconut encased in a layer of rice paste , wrapped in banana leaves and then steam-cooked. As it cooks, the rice absorbs the earthy aroma of the banana leaves. I love the ada whether it is filled with coconut and sugar, jaggery, or jackfruit.
But the similar preparation I was used to at my household, was pathiris and pies made of rice paste, rice flour, or steamed rice. One such pie (pathiri) is the meen pathiri, rice ground to a paste with coconut and spices, and filled with fish/shrimp masala and steamed in banana leaves. While the meen pathiri is traditionally made as a pie, cut into triangles and served, I found it easier to handle the stuffing when it is shaped as an ada. Quite like a pocket pita sandwich. So it can be made either way.
I first tasted the shrimp version of the pathiri when my aunt made it and found it a nice variation from the fish masala as the shrimp adds a hint of sweetness to counter the spicy filling. So this recipe from my aunt(elama) was a must add to my collection, especially since we get more fresh shrimps here than fresh sea fish. And though I cannot recreate the flavor of banana leaves, I reconciled to making pathiris using parchment paper or aluminum foil. Not quite the same, but the contrasting texture of soft and crunchy, the mild coconut flavored rice shell and the spicy shrimp filling is just as satisfying.So I decided to blog abou the shrimp ada before the meen pathiri.


You will need: this makes about 10 adas
For the filling:
Shrimp- 1lb
Onion- 3 medium sized ones
Tomato-1 medium sized one
Green chilies- 4
Red chili powder-1 tsp
Coriander powder- 1 tsp
Turmeric- 1/2 tsp
Curry leaves- 3 sprigs
Salt to taste
Oil- 4 tbsp
For dry roast:
Coconut grated-1/2 cup
Shallots-4 small ones chopped
Fennel seeds-1/2 tsp
Green chilis-2 chopped
Preparation:
1. Wash and marinate the shrimps in ½ tsp chili powder, ¼ tsp turmeric and ½ tsp salt. Keep for 15 mins.
2. Chop the onions, curry leaves and green chilies finely .Heat 2 tbsp oil and sauté the onions, chilies and leaves in that order. When they look translucent, add the chopped tomato and the spice powders. Cover and cook for 5 minutes or till the tomatoes look pulpy and add salt. Add a bit more oil if needed. Stir and sauté till the whole mixture gives out oil and moves as one mass in the pan. Keep aside. In another pan, add the shrimp and let it cook in its own juice till all the juice dries out. Add the remaining 2 tbsp oil and let it fry for a minute or two.
3. Remove and coarsely chop the shrimps (or use a chopper) and add to the onion mix and stir together on low heat.
4. Meanwhile, in a cast iron skillet or a heavy bottom pan, dry roast the ingredients specified above, all together on very low heat till the coconut gives out its aroma and starts turning brown at the edges. Take it off the flame and pulse in a dry grinder to powder it coarsely. No water is to be added.
5. Add the powdered coconut to the shrimp mixture and stir everything together. Turn off and let it cool down before filling.

The rice paste:
Rice flour- 1cup
Water- 1cup
Salt- ½ tsp
Fennel seed powder- ½ tsp
Coconut milk - ¼ cup (or use ¼ cup coconut ground with little water)
The rice shell can be made by soaking parboiled rice and grinding it with coconut and fennel seeds to a wet paste, as RP of My Worshop has described, or you can use rice flour mixed with water to make a pliable paste as Healthy n Spicy has described.
Two reasons for using the longer method of cooking the rice flour. a) so that it remains super soft the next day also. b) To make it easier to roll it out thinly.
6. Heat the water with salt till it boils and then add the rice flour. Do not stir. Turn off the flame and keep it covered for 5 minutes. Open it and stir in with the handle of a spoon and cover it again for 5 more minutes. Spread the flour mix onto a mixing plate and let it cool down. Add the coconut milk/ground and fennel powder and then knead it into dough. It will be a little sticky to begin with but as the dough comes together, it gets easier. The final consistency is a little wet as compared to a bread or a chappathi dough.
7. Cut parchment paper into suitable size squares. Place a lemon size ball on the paper and flatten it with the heel of the hand (like doing karate chops) to avoid sticking to the hand. If that is difficult, place another parchment paper over it and roll it with a rolling pin to a palm sized disc. Remove the top paper carefully. Place 2 tbsp of the filling on one half of the dough and gently fold over the other side (with paper) to align exactly at the edges and seal the edges, pressing down on the paper.
Check out Priya's kitchen for a wonderful description of the ada with emphasis on steaming and parchment paper.
For steaming, use a steamer or rice cooker or any large vessel half filled with water. Place a colander or a steamer basket over the water when the water boils and reduce heat to medium. Place the adas in the basket, cover it and cook for 7-10 minutes. Let it cool down before serving.

September 12, 2008

Onamashamsakal....


Onam fell on a working day this year too and for most of the us mallus here, sadya is something everybody back home had (if they are working) or its time shifted to a sadya dinner. So I hope you all had a great sadya and are ready to sit back and smile at an American Onam vignette...

September 09, 2008

Unnakaaye-Stuffed Plantain Pods.....

Unnakaaye is a Ramadan specialty made on the fasting days as one of the quick bites to break the fast with. The ladies sat around in the evening assembling it to distract the mind from the last leg of the fasting hours. Well... it's really a quick one to get gobbled up and so is needed in large quantities for a joint family. But now just like any other palaharams/ delicacies, it has become commonplace and is available year round at restaurants and even bakeries.


Unnakaaye with coconut filling......

So what is it? Unnakaaye, despite its exotic name, is just mashed plantains stuffed with a egg filling or a coconut filling, shaped into pods and then deep fried.
The name "unnakaaye" comes from its appearance.. that of a unna meaning "cotton" and kaaye meaning "buds or pods" i.e. the fruit of a cotton tree.

Has anyone seen the pods hanging from a Cotton Tree.? They are tapered at the edges and bulging in the middle and have a smooth skin while green. As they slowly dry up, the outer smooth skin withers to a dry brown and finally splits open, dispersing the cotton inside with a million seeds. You must have caught some stray ones flying and played with them if you had a tree in your neighborhood, making a wish as they fly away. My aunt's house had a cotton tree. And she used to harvest the pods early and dry it and remove the cotton inside. That is used to make stuffing.....for pillows,cushions, beds etc.

Unnakaaye has to be made with plantains which are not fully ripe. For a long time, I couldn't figure out how ripe it should be while buying, so I would buy them when they were hard and yellow, forget about making these pods and then after 3-4 days, when they ripen fully, end up making fritters out of them! Now I think I got it right.. they should be a little soft when pressed, a good bright yellow outside with slight brown dots and then they are good for this recipe.

You Will Need:
Plantains-1
Oil for frying.
Filling Ingredients Specified Below.
Preparation:
Steam the bananas using a steamer for 5-10 minutes. It is cooked when the peel separates slightly at the edges.Don't boil it in water. Sometimes for a small quantity, I use the microwave to cook it as per the microwave's instructions. Just wash it, cut it two pieces (with the peel) and then lay it on a plate and microwave it for 2-3 minutes.
After it cools down for 3 minutes, peel it and cut it along the center. Carefully cut out the central spine and seeds. Using a potato masher or the base of a glass, mash it into a smooth dough without adding any water. It should be free of lumps and evenly cooked. Keep covered till the filling is ready.
After the filling has cooled, oil your hands and divide the dough into equal sized balls. Some make it big, some make it bite sized.. so whatever size you are comfortable with. I could make 4 pods with one plantain's dough. So the filling and dough quantities are approximate. Take care not to over fill the plantain or it will collapse while frying.

Knead one of the portions and flatten it on your cupped palm as a small round. Put about 1-2 tsp of filling( depends on your size of dough)in the middle and close the edges to cover it. Take care not to have any holes or tears. Only if the dough is smooth, will you be able to cover it completely. Roll the pods with your hands applying slight pressure, till it becomes smooth and pod shaped.
Heat oil and deep fry it till it turns a nice golden brown. Drain onto paper towels and serve hot. You could shallow fry it in enough oil to cover it halfway, but it needs more care and patience as it has to be turned to ensure even browning.

Unnakaaye with egg filling...
Egg Filling:(for 4 pods) Beat 1 egg with 1 tablespoon milk and 1 1/2 tablespoon sugar till the sugar is melted in. Heat ghee in a pan, scramble the eggs quickly and then add 1 teaspoon of finely chopped cashews/almonds, raisins and a good pinch of cardamom powder. Mix and keep aside. The cardamom masks the eggi-ness of the eggs so its important to add the spice.

Coconut Filling: (for 4 pods) Heat a cast-iron pan and add 1/2 cup of grated fresh coconut and 1-2 tablespoon of sugar. Stir well on medium heat till the sugar melts and sweetens the coconut. Add the nuts, raisins(optional) and cardamom powder and remove from the heat. You may have leftover filling if your pods are too small.

September 04, 2008

Muringakka Thoran...


Since there are people who love Muringa/Drumstick plant out there and some who even get the Muringakka/Drumsticks, here I am following up the previous post with a thoran/stirfry with coconut made of the fruit of the Drumstick Plant. The fruits are the long stem like objects hanging from the tree resembling actual drumsticks.
Drumsticks are great in a variety of recipes in Kerala cooking. They are particularly indispensable in Sambar and Avial. But there they have a side role where in this thoran, they are the main lead, front and center. You either love them or you don't.
Again, I am just posting this for the fun I had in eating it at home, leisurely pulling off the fruity seeds inside the cooked drumsticks and then chewing and discarding the covering. The drumsticks and the coconut ground into it were from my parent's "organic" :) vegetable patch. (Expatriates, please don't get mad.)


You will need:

Drumsticks- about 10
Green chilies- 3
Garlic- 1 small clove
Coconut-1 cup(grated coconut)
Turmeric- 1/4 tsp
Salt as needed
Coconut Oil-1 tbsp
Mustard seeds- 1/2 tsp
Curry leaves.

Cut the edges of the drumstick and peel the outer skin lightly. Cut drumsticks into 2 to 3 inch long pieces. Cook it with the turmeric and salt in a little bit of water. The cooking should be on low to medium flame. The thoran/stir fry is semi-dry so adding too much water in the beginning will dilute the flavor and make it watery. When it is half cooked, add 3 green chilies, slit vertically. When the muringakka/drumsticks are cooked fully, they change color to a dull greenish yellow and start coming apart when poked with a spoon.

Meanwhile, grind the coconut with 1 garlic clove to a coarse paste without adding water if possible. Mix it with the cooked drumsticks, taking care not to have too much water in the drumsticks. Mix thoroughly and adjust salt as needed.

Seasoning:
Heat the oil and add the mustard seeds. Cover and let the seeds splutter and then add the curry leaves. Pour over the drumsticks and mix. Serve with rice.

September 02, 2008

Muringya Ela Curry/ Drumstick Leaf curry

Ramazan Mubarak to all my readers!! I don't like to dwell on the religious aspects here as this is a food blog so let me jump to a very popular recipe back home.

Sometimes the things you enjoy the most and yearn for the most are the simplest and easiest to find in the right place and time. But taken out of its context and it becomes a delicacy, a rarity and a treasure.

Muringya ela curry is one of those curries that's made with the leaf of the Drumstick plant. A very common tree, easily grown in most households, it gives really a unique tasting leaf and the luscious drumsticks. The leaves have to be plucked without the stems..quite a labor intensive process best done by a couple or more ladies together with some gossip thrown in to break the monotony of the job.

Now this preparation of the leaves cooked in a coconut gravy goes best with the light Pathiris and tire pathiris.(Recipe coming soon ...) And since both these pathiris are really from the outlying areas of Kozhikode, I think this curry is also originally from the inlands of Malappuram, Vadakara etc.

In Kozhikode, pathiris are served mostly with ishtoo..chicken stew, beef stew, mutton kurma etc..even for breakfast.. but in Malappuram, its only in the last decade or so that meat and fish became readily available and commonly consumed. During my childhood visits to the tharavadu at Malappuram, Pathiris were served with this muringa curry for breakfast. There was a drumstick plant adjacent to the property "compound" wall. The leaves were then plucked by us kids, climbing on the wall and stretching precariously to reach the upper leaf laden branches. A couple of falls each time with some minor scrapes were common too.
The Malappuram pathiris are so thin and airy that dunking them with this curry, two folds down and you can easily down a good number of them without blinking.

On the east coast here, we haven't seen Muringa/Muringya leaf yet in the Indian stores though its available in the West coast. So we really enjoyed this curry at our parent's house for breakfast and even got it for dinner at my aunt's house who made it especially for me. So if you get this leaf in CA or Dallas, here is the recipe to go with it.


You Will Need:
Drumstick Leaves: 1 cup
Green chilies- 2
red Chili Powder- 1/2 tsp (more or less as per taste)
Turmeric- 1/2 tsp
Coconut grated: 1 cup
Shallots- 3, very thinly sliced
Curry leaves
Oil for seasoning.

Preparation:
Wash the drumstick leaves well. Take care not to have any bits of the stem. Cook the leaves with the slit green chilies, turmeric, chili powder and salt in 1 1/2 cup water for about 10 minutes. Grind the coconut with 1/2 cup water to a very fine paste and add to the cooked leaves. Allow the whole mixture to boil once. Adjust salt as required. Some people add garlic and cumin seeds to the coconut while grinding but its optional.
Heat the teaspoon of oil and fry the shallots till light brown and then add the curry leaves. Pour this oil over the curry. Serve with Pathiri, chapathi or triangle porotta.