If trying out with chicken, it has to be drained well, sauted with masala for 8-10 minutes, and the baking time has to be reduced to 10 mins in the oven. Chicken gets cooked instantly so be observant of the water quantity.
Prepare all the ingredients as noted earlier for biryani. Boil the rice without frying in lots of water for 6-7 mins with the whole spices and salt added to the water. It should just turn opaque and not more than half cooked. Drain it and allow it to dry. Make some dough as for rotis or use leftover dough.

The ingredients are the same as for the regular mutton biryani.See here for details.
Follow steps 1 to 5 as for regular biryani. Marinate the meat for an hour or more.
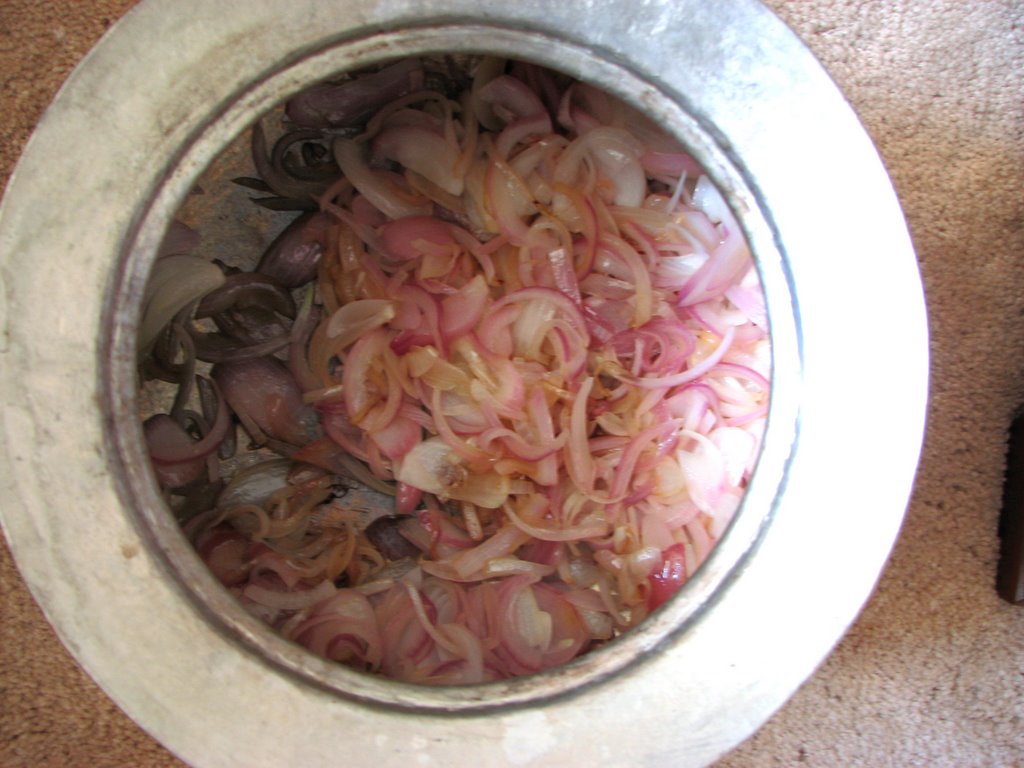
Saute the onions in the Chembu itself till translucent and then add all the other ingredients.

Add the leaves,salt and cook on high flame for 8-10 mins for the extra water to evaporate.
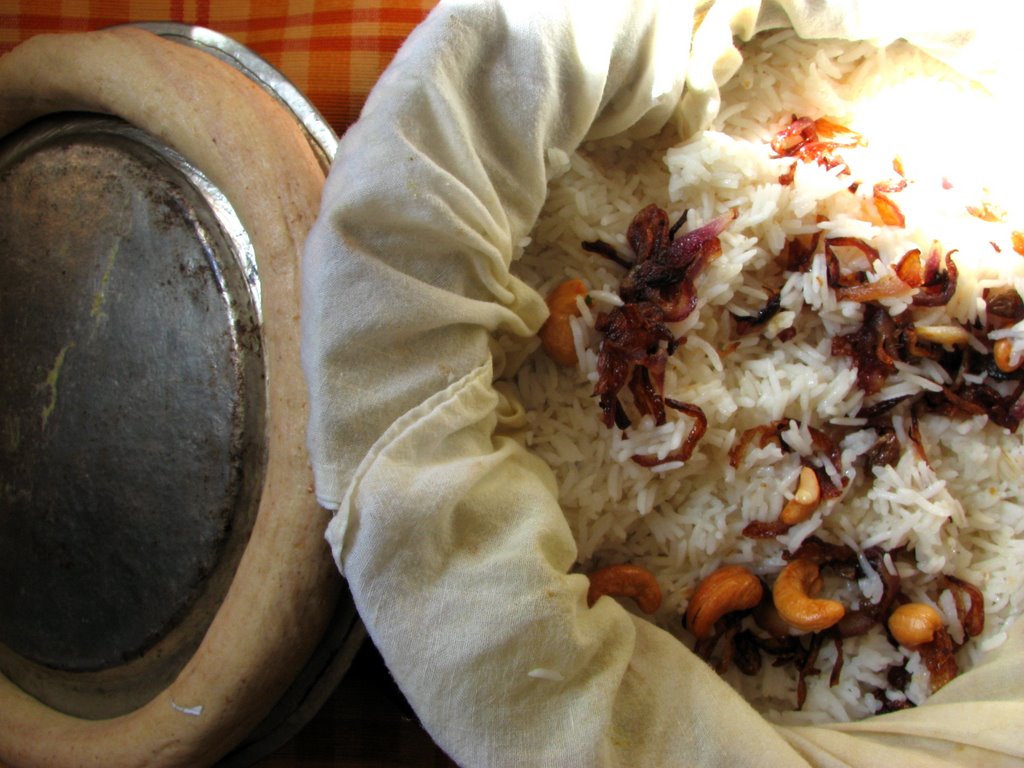
Turn off the flame. Spread a clean wet muslin cloth over the masala and layer the half cooked rice on top garnished with the fried onions and nuts. Alternatively, you could line the masala with aluminum foil, pierced with holes, with edges overlapping on all sides. Sprinkle a little biryani masala and lemon juice on top. The lemon juice prevents the rice from sticking together. Now the Biryani is ready to be sealed. Make a long 1 inch thick roll of the dough and circle it on the lid in one unbroken piece.
Close the lid, pressing firmly along the dough to adhere the lid with the dough to the base. Make sure it is sealed without any holes. Once it starts cooking, the holes are difficult to be sealed again. Put any weight( any heavy vessel will do) on it for the initial 10 minutes to press down. Place on the stove top on high heat for 10 mins. Preheat the oven to broiler setting only if you have a top mount broiler. Else preheat it to 400 degrees. When you see and hear the hissing sound of steam trying to escape from under the lid, it means the steam has risen to the top and is ready to go into the oven. Now ideally this part of the cooking is done with smoldering coconut husks, shells and embers on top, but we can replicate that in the oven. Place the vessel carefully in the middle of the oven with the heat coming from the top for 5- 6mins.
Reduce the heat to 250 degrees(Bake)and allow it to cook for a further 20 minutes.
Then turn off the oven and let it cool for 15 minutes. The dough will have a golden color to it. Open carefully by breaking the dough with a blunt edge. The steam is scalding so it is a good idea to forgo curiosity for some more time if needed.

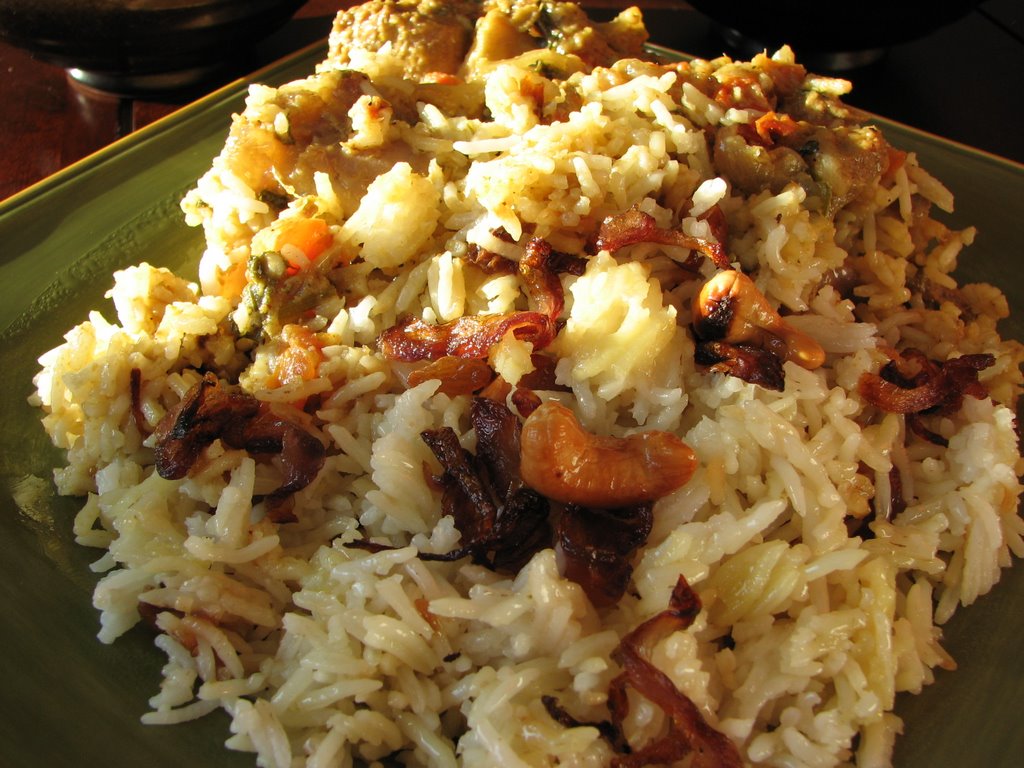
Spoon out the rice onto a serving plate till you reach the cloth lining and gently pull it out. The meat gravy should have thickened with the oil risen to the top. If there is still too much gravy, just simmer it on high heat for 5-7 minutes more. Mix the rice with the meat as required with more masala on the side or serve it layered but not thoroughtly mixed. Add salt if needed.
The whole process looks complicated but is just a matter of timing. The first time may not come out exactly perfect, but it only gets better with experience. Modify the time at each stage as per your masala's consistency and the quality of meat. Try it with any vessel that you can put in the oven.
The biryani without the masala mixed in.
Related Links:
Mutton Biryani
8 comments:
So authentic.
It is good that u posted all the snaps...for those who r not familiar with the whole process it is indeed a wonderful help...not bad u got u'r biriyani chembu all th way fr calicut...
Wow Mallugirl, thanks so much for the clear instructions and the pictures, I've always wanted to make this, but never knew how! Definitely going to try it out.
Oh yes! Did I ever tell you that it was one of your biryani recipes that introduced me to your blog? Yes, that is why I read this post with wonderful sentiment thinking of how I got to know you. When I come over to New Jersey will you make this for me?
Nice detailed narration with pictures. I've always wanted to make chicken biryani from the scratch. Used different ready made spice mix so far.
Thanks a lot Shaheen - for the patience in chronicling this recipe! Its so authentic. Can't wait to try it!
Dum Briyani never made with separate cooked rice layered, instead it cooked by adding rice with the masala. It needs expertise to prepare with the right ration of water and rice
Anon, the rice is not cooked fully. just half cooked. and this is one way the biryani is made by people in calicut. i have seen the hyderabadi biryanis made with raw rice and u are right, it takes expertise to make it correctly. i am no expert.:)
Post a Comment