December 25, 2006

JFI-Thenga Chor/ Malabar Coconut Rice


AJFI-Jihva for Coconuts would be incomplete without a word on the coconut itself. It is said that there are as many coconut trees in Kerala as there are stars in the sky. Anyone who has even the tiniest pocket of land would have at least a couple of palms on it. Coconut palms endearingly dot the front yard and backyard of every house along the Southern Coast. There coconuts are freshly grated for every dish and even now, the preferred drink for guests are tender coconut water blended with the soft coconut flesh, cardamom and sugar.

Harvest

I remember being asked to write essays on the beneficial qualities of the palm tree in school and wondering what good this would do in my education. What was then disregarded as homework and written by rote, now interests me as everyone around me is concerned about organic and functional utility. The palms are hand harvested by agile climbers. They use just two loops of coir rope(which is organic made from coconut husk) one for the hands and one for the feet to climb up the 20-30 odd feet up to the bunches of fruits. The palms also act as support for the pepper vines.

Climbing tree

Anywhere from 5-20 coconuts are harvested from a single palm depending on the type and age of the palm. If left unharvested, they over mature and start dropping off one by one. If we were around during the harvest, we would plead for tender coconuts and spend the afternoon scraping out the soft flesh and guzzling the coconut water. The coconut water is sweet when found inside unripe coconuts and turns a bit bitter as the fruit matures and the flesh thickens up.

Every part of the fruit from the husk to the shell and the flesh inside is used in some way or the other. As everyone knows, the white flesh is grated and used in curries or ground to extract the milk. The extra coconuts are stacked in a dry place, sometimes over the kitchen attic, dried over indirect heat into Khopra, which are then pressed to yield coconut oil. Coconut oil extracted from the dried Khopra possesses healing properties as shown here and is extensively used in traditional medicine among Asian and Pacific populations.
Though badly maligned here, the health benefits of coconut oil is still being researched and debated. however, it still has fat calories similar to cream and should be used sparingly.


When the JFI ingredient was announced, it was a question of what not to post as a lot of our traditional recipes are based on coconut. I chose coconut rice for the JFI to highlight the unique flavor of coconut and rice together. Adding coconut milk to rice is common in Thai and Malaysian cooking but adding it with fenugreek and fennel seeds is unique to the Malabar region. The bitterness of the fenugreek is nice contrast to the sweetness of the coconut and fennel seeds. Try this with any spicy curry and lentils.

You will need:
Kali Jeera Rice or any medium grain rice - 3 cups or 500 gm
Cardamom(Elakkai/Elaichi) -3
Fennel Seeds (perunjeerakam/saunf)-1 ½ tsp
Fenugreek seeds(Uluva/Methi)- 2 tsp
Shallots/ Red Pearl Onions-12
Coconut Grated- 2or3 cups or 1 can coconut milk.
Ghee/Olive oil – 1 tsp
Salt- 3/4 tsp or to taste
Water- as needed.
Coconut Milk: Grind the grated coconut with the fennel seeds, cardamom, 5 shallots and1 cup water for a minute and then put it in a blender processing it at high speed. Strain with the back of a spoon into a strainer, pressing out all the liquid. Repeat blending using the same coconut and ¾ cup water as the coconut is already moist and extract into a separate bowl. This can be done twice or thrice as the second and even third extracts is the thin coconut milk which has flavor and is used as cooking liquid instead of water. The first milk is to be kept aside to be added to the rice only after it is fully cooked. You should have 1 cup of first milk and at least 4-5 cups of the thin milk after extraction.
1. Clean, wash and drain the rice. Slice the remaining shallots finely. Keep the coconut milk ready.
2. Heat the ghee/oil in a heavy sauté pan or a pressure cooker and add the remaining shallots, the fenugreek, the rice and 4 cups of the thin milk. Add water if your thin milk is not enough. The proportion should be 1- 1 1/2 cup of liquid less than needed for full cooking.
3. Bring the liquid to a boil and cover and cook. In a pressure cooker, this would take only 2 whistles and then turn off the flame. Alternately, you could cook it covered in a sauté pan on the cooking range for 10-15 minutes keeping the flame very low. Add salt as needed.
4. Keep the pan covered for another 5 minutes after turning off the flame as the rice will continue cooking. Open, place it back on the fire and add the remaining 1 cup of thin milk and let it simmer for 5 minutes. Check to see if the rice is fully cooked. If not, add more thin milk and let it cook on low heat. When it is fully cooked, add the thick milk and gently fold it in. Do not boil it after the thick milk is added. 5. Remove from fire and let it sit covered for 5-10 minutes to allow the flavors to soak in. The finished texture should be somewhere in between a creamy risotto and separated overcooked grains.
Fluff the rice gently and serve warm. This is served traditionally with meat curry but any spicy curry will favor it well.

P.S. The liquid needed varies with the type of rice so follow the package instructions for the amount of liquid. Traditionally this is made with parboiled rice, a kind of rice which is steamed before it's husked, a process that causes the grains to absorb many of the nutrients from the husk. When cooked, the grains are more nutritious, firmer, and less clingy than white rice grains. This rice is available in any Indian store and Uncle Ben has a version of parboiled rice which is close to but not exactly the Kerala one.

The cooking time and liquid needed is different for parboiled rice. The water needed is three times the amount of rice so make note and adjust the coconut milk accordingly.
I made a variation and found it tastes just as good with kali jeera rice or any medium grain rice. It cuts down on the cooking time and amount of milk used drastically.
, , , , ,

December 22, 2006

Erachi Curry/ Mutton Curry


This can be made with mutton or beef as preferred.
Cooking time:3/4hr to 1 hr
You'll need: Serves 4-5
Beef or Muttton -1/2 lb or 250 gm
Onions - 2 large, thinly sliced
Small Green chilies -4
Ginger -1 ½ inch
Garlic -6 cloves
Tomato – 1-2
Turmeric powder – 1/2 tsp
Roasted Coriander powder – 2 tbsp
Paprika or Kashmiri Chili Powder- 1 ½ tsp
Red Chili powder -1 tsp
Fennel powder -1 tsp
Cinnamon- 2 inch piece
Cloves-3
Curry leaves, coriander leaves - A handful of each, washed and chopped
Any oil – 2-3 tbsp
Salt to taste

Preparation:
1. Clean and cut the beef or mutton into small pieces. If using mutton, wash it again with 2 tbsp lemon juice to get rid of smells.
2. Slice the onions, chilies and tomatoes finely. Grind ginger, fennel seeds and garlic into a paste. Mix half the dry chili powder and turmeric with the meat and keep aside for a while.
3. Heat the oil in a heavy bottom pan or cooker and fry the cinnamon, cloves and onions on medium heat. Add the green chilies and curry leaves and stir for a minute. Fry till the onions wilt and start turning brown at the edges. This would take about 8-10 minutes. Now add the ground paste and sauté it till the aroma comes from the ginger and garlic. Add the spice powders and the meat and sauté on medium heat for at least 10-12 minutes. This is crucial as this is the time for the spices to get cooked.
4. When all the water is gone from the meat and it starts looking brown, add the tomatoes, and 1 1/2 cup water. Add the salt, taste the spice level and raise the heat. When the liquid boils, cover and cook for 30-40 minutes on very low heat. At this point, you could pressure cook it for just 2 whistles. Take care not to keep stirring in this time. When you agitate it by stirring and tasting, the oil in it will get emulsified and will not rise to the top. Then the texture and the taste of the curry will not come out clear.
5. Check to see if the meat is cooked only after at least 20 minutes. If more quantity of meat is being cooked, more time will be taken, so be patient or use a pressure cooker. When the meat is cooked, add the chopped coriander leaves and check seasoning.
6. If you plan to add potatoes, be careful not to overcook it as it breaks down and makes the curry pasty very fast if it is not watched carefully. Add it in the last 5- 10 minutes of cooking only.
This is my contribution to Feed a Hungry Child campaign - group book project! Hosted by My Dhabha. It is intended to raise the funds for FAHC campaign by a voluntary ‘Group Book Project’ at My Dhaba where food lovers from all around the world participate and contribute to the finished product which is going to be intriguing treasuries of original traditional home cooking recipes.
, , , ,

December 19, 2006

Spaghetti with Fennel and Tomatoes.

Spaghetti
Nowadays when I head for home, it is already gloomily dark outside and my son asks me why am I picking him at night. It took him a while to grasp the nuances of seasons and daylight. While winter is necessary for the renewal of earth and is a natural cycle, the lack of sunlight really erodes our activities. In our quest for maximizing daylight by turning the clock back in summer, we only make the transition into the dark winter more poignant. So its more of TV, scrabble and monopoly along with homework.

The pseudo night and the cold weather is making me feel hungry faster and lazier to cook an elaborate meal. So spaghetti or any other kind of one pot meal is welcoming and appreciated as we all slurp away in abandon. Everyone has their favorite one pot meals, whether it is a pulav, or noodles or fried rice or soup. In our house, pasta is a fool proof menu staple. Most of the time I just make it any way I like but when I was asked for a specific recipe, I had to think and settle on one recipe.

This recipe happens to be from the cookbook Jamie Oliver’s cookbook Happy Days. It has numerous delicious recipes using pasta, meat and fish, simplified in language and techniques. Jamie has an instinctive sense of cooking, and most of the recipes are fairly easy with just an emphasis on fresh ingredients and simple yet satisfying flavors. Jamie Oliver puts a bit of his nonchalant self into each recipe’s introduction and makes the book a good time pass read too. So you won't find any convoluted method or long drawn out recipes which is just what I need on weeknights.

The fennel in this recipe is what attracted me to it. Malabar cooking has fennel seeds in almost all its recipes so it is interesting to see fennel bulbs in use here as well as fennel powder. The sweetness of the fennel cuts the acidity of the tomatoes without any additional cream or cheese. I didn’t add salami as I don’t use it but you could add any sausage or salami you like. So here is the recipe without many changes from my side.


You will need Serves 4
Preparation Time:35 minutes
Spaghetti- 1 lb
For the Sauce:
EV Olive oil
Garlic-2 cloves
Crushed Red Pepper-1/2 tsp
Fennel Seeds-1 tsp
Fennel bulb-1 whole
Plum Tomatoes-2 cans of 14oz each.
Sea salt and Black Pepper
Small handful chopped parsley or fennel green tops.
For the Crunchy Topping:
2-3 slices of stale bread.

Preparation:
1. Fennel Bulbs are also called as anise sometimes. The bulb is the part which imparts the fennel flavor but I did use the stalk too. Quarter the bulb lengthwise and cut out the base like you would for cabbage and slice it like onions. Slice the garlic finely.
2. Pour 2-3 tbsp of olive oil into a pan. Add salami (if you are adding salami) and sliced garlic. Add the crushed fennel seeds. Stir on medium heat and add the finely sliced fennel, dried red chili flakes and let it cook for about 5-8 minutes or till the fennel starts wilting. Add the tomatoes and let it simmer covered on low heat for about 20-25 minutes. The sauce will start thickening and when it is almost ready you will see droplets of oil arising randomly. Season with salt and pepper and keep aside.
3. Give the sauce a 5 or 10 minute head start, and when it reaches the simmering state, start on the pasta. Heat water and 1 tsp of salt in a pot large enough to accommodate the spaghetti and add the dried spaghetti when it comes to a boil. Cook the spaghetti as per the package instructions as the cooking time varies from brand to brand.

Meanwhile, to make the crunchy bread crumbs (pangritata as Jamie calls it): Make coarse bread crumbs from the stale bread by chopping it in the food processor. Heat 2-3 tbsp of olive oil in a pan and sauté the bread crumbs on low heat till they turn golden and crisp. Add salt, pepper and any herb to flavor it.

4. When the spaghetti is cooked until al dente (it should still feel a little undercooked), drain it in a colander and toss it into the sauce. Stir to coat the pasta evenly and let it absorb the flavors. Serve onto a large bowl and sprinkle with the golden bread crumbs, chopped green fennel tops or parsley over all.

Related Posts: Spicyana's Fennel Pasta

Don't forget to check out my post at The Daily Tiffin.

December 16, 2006

Plantain Pancakes.

Pancakes
I am on my plantain craze. I keep buying them when I see them, nostalgically thinking of all the wonderful Kerala dishes I can conjure up but then they are not ripe enough or get too ripe by the time I find time to cook. Visions of a whole bunch of bananas with the bottom half ripening, hanging in the shops in Calicut dances before my eyes as I pick them from an assorted bunch of ripe and unripe ones here.
I buy them when they are yellow with a little green streaks outside and firm to the touch and let it ripen on my sunny window side. They are ripe for cooking when the ends turn black and dried up. As they get blacker on the outside they are still good for eating but cook too fast and breakdown.

This is for one of those mornings when the kids are having their pancakes and you crave something a little different. It doesn't taste like fritters (Pazham Pori) but it doesn't taste like pancakes anymore. The rice flour and the black sesame seeds gives it a Kerala taste. This same mix can be used for dipping and deep frying the plantains but it soaks up a lot of oil unlike the original fritter's recipe. It tastes very crunchy though. Yum!! So spreading some oil on top and bottom lets it crisp up and cooks the banana too. Use bananas that are ripe but not too ripe.
Use store bought pancake mix (yes, I know it has preservatives but still it is easier to use that on a weekday rushed morning) or make the pancake batter from scratch using this recipe. For those who don't like messing with their Plantain Fritters (Pazham Pori)try the original Plantain Fritter recipe.
You will need: For about 6 pancakes
Fully ripe plantains-1
Pancake Mix-1 cup
Rice flour- 1 tbsp
Sugar -1tbsp
Black sesame seeds- 1/4 tsp
Water - 1/4 cup
Oil /Butter
Preparation:
Peel and cut the banana into diagonal slices of about half inch thickness.
Mix all the dry ingredients together and then add water slowly while whisking to make a smooth thick paste. It should be lump free and not too watery. If it does become watery, add a little more flour.
Heat the pancake griddle and spread a bit of oil or butter. Lower the heat to a medium and pour the mix as you would for pancakes and place one or two slices of the plantain on it, taking care to let the banana slices sink into the batter. Cover the banana slice with a thin layer of batter.
Cover the pancake with a lid for half a minute. When the first side is cooked, bubbles would cover the pancake surface and begin to pop. Spread a tsp of oil or butter on this side and flip the pancake over and after it gets cooked, remove onto plate. Serve with the syrup of choice or eat it plain.
This definitely doesn't taste good after some time so serve it hot.


, , , ,

December 15, 2006

Sattui Winery Visit, Napa Valley, CA

A bit late as I was caught up at work but here are some of the photos from our visit to a winery in Napa valley during our visit to San Francisco last month. The famous and historic wineries there have been instrumental in giving Napa Valley wines their worldwide recognition. So we felt a laid back visit to the vineyards, is a good way to understand the easy going West Coast way of living.
The drive to the Napa Valley was pleasing as we left the city and saw endless green and brown. But when we approached closer to the Highway 29 from Yountville, just past the town of St Helena, we did slow down to a snail's pace due to the traffic.

You don't really have to be a wine connoisseur to appreciate the beauty of the rolling Napa Valley countryside and explore a winery there, which is what we had set out to do. You could do a tasting there and visit the cellars to see how wine is made and packaged. You do need a love for bread, cheese and spreads as that is the only food (and sometimes BBQs) available for miles around. This winery had a picnic area open to the public so while we ate, the kids frolicked around. Lots of food and a good day out in the sunshine.


The Sattui Winery building. V. Sattui is a family-owned winery established in 1885 and located in St. Helena, the very heart of California's famous Napa Valley.


The welcoming signboard broadly proclaiming its superior status.


I thought there would be endless wineyards towering over us into which we could walk through, with tantalising goblets of grapes hanging profusely. No doubt prompted by the photos of the Italian wineyards. But this was a dwarf variety of vines all along lines, not much taller than us, and had tiny (but very sweet) grapes randomly. Still it was a sight to see wineyards stretching over the hills all around.


Maybe it was past harvest, so this bunch was one of the last few left.


What's a winery without wine bottles, right?


Wait! But there's more... We had a lot of fun perusing through the amazing collection of rare and familiar cheeses. We tried some, bought some types and demolished the lot with our lunch. Certainly quenched my cheese fetish.


The other eye catching item was the rows and rows of various spread made on premises. With ample breads cubes,dips and spreads for tasting all around, it was tempting to buy a lot. Some were good, some were a stretch of imagination such as "Spicy Apple Garlic Jam","Rasberry Cranberry Chipotle Jam", Peach Chutney" etc.


Oh there's more....The other spreads were "Sesame Mustard", "Spicy Honey Mustard", and "Creamy Horseradish With Dill".

Some of the wide variety of breads..Pain Levain, A kind of crusty but soft on the inside bread, Olive Bread, Walnut Bread, Herb Garlic Flat Bread were there inside the winery for an impromptu lunch on their backyard picnic tables.


This Herb bread dipped in Sattui's Balsamic Dipping Oil is a must try for all bread lovers. We finished one of those yummy bottles of oil and vinegar in a week! So much for a low carb diet!

December 13, 2006

Payar Thoran/ Steamed Yard Long Beans


The yard long beans are the really long thin beans which are available in both dark green and pale green colors. The dark green ones have a thicker skin and take longer to cook than the thin skinned pale green ones. The paler version tastes similar to the ones we get back home so whenever I find it at the Asian stores, I have to get it right away. It has a softer taste and texture, and my son loves it. Back home, this is a farm fresh item on the lunch table and this steamed and partially stir-fried beans recipe has just green chilies, mustard and coconut to bring out its texture. I like to cut it into tiny pieces but you could cut into an inch long piece also.

The photo on the right shows dark green yard long beans that grew in my vegetable patch last year. I had planted the imported seeds of a pale green beans but the beans that grew turned out to be dark green.

You will need:
White Yard Long Beans-1 bunch chopped finely
Mustard Seeds-1 tsp
Turmeric-A pinch
Green Chilies-2 slit vertically
Curry leaves- 1 sprig
Grated Coconut-1 1/2 tbsp
Oil-1 1/2 tsp
Salt to taste

Preparation:
1. Heat the oil in a small wok/pan and as it heats up, add mustard seeds and cover till it stops spluttering. Reduce the heat and add the curry leaves and chilies and stir once. Add the beans, salt, turmeric and 1 tbsp water. Cover and cook on medium flame for 5-10 mins till all the beans gets cooked. Open, check seasoning and add the grated coconut, mix and keep covered for a minute. Serve with rice.

, , , ,

December 08, 2006

Stir Fried Chicken with Mushrooms and Cashews

Chicken
A quick stir fry to liven up the dinner/lunch table and answer the question..hmm what shall I cook today? Use the basic spices and vary the vegetables as you have available.
You will need: Serves 3
Chicken-1/2 lb Boneless or use 1 chicken breast cut into pieces.
Dried Mushrooms (Shitake)- A handful
Onion-1 medium
Any Bell Pepper/Capsicum (Optional)- 1/3 of a pepper
Green Chilies -2
Red dried chili-3
Garlic-3 crushed
Ginger- ½ inch crushed
Scallions/Green Onion-3 stalks
Cashewnuts-A handful
Soy Sauce-2 tsp
Oyster Sauce-1/2 tsp
1/2 tsp black pepper
Oil-3-4 tbsp
Salt to taste
Lime juice-1tsp

Preparation:
1. Soak the dried mushroom in warm water for 20-30 minutes and squeeze out excess water and slice finely. Marinate the chicken in the soy sauce and oyster sauce for the same time.
2. Dice the bell pepper and chicken into the 1/2 inch squares.(The chicken should also be the same size cubes.) Keep the green part of the scallions to be added in the end.
3. Dry roast the cashews on low heat till fragrant and crisp. Alternatively, to make it richer, fry the cashews in a bit of oil till golden.
4. Heat the wok or pan to a high heat and add the onion and peppers. Stir fry on high heat for a minute and then lower heat and add the chilies, ginger, garlic, mushroom and stir fry again. After a minute, add the chicken and fry for at least 5-8 minutes or till the chicken gets cooked. From experience, I learnt not to mess with the size of chicken. Boneless tiny pieces is better off as then it gets cooked in the same time as the other ingredients. Check soy sauce and add a tiny bit more if needed.
5. When the chicken is cooked, add the cashewnuts, pepper, scallion’s green stem chopped and the lime juice. Toss well and adjust salt as required. If there is a lot of liquid left, add ¼ tsp of corn flour mixed with 2 tbsp water and let it simmer to thicken the sauce.
P.S. Use only dried mushrooms for this dish. It has a smoky intense taste which are lacking in the fresh ones. Any kind of dried ones (availiable at any Asian grocery store) will do but in this recipe, I used Shitake mushrooms. Also use dried whole red peppers not pepper flakes.

, , , , , ,

December 06, 2006

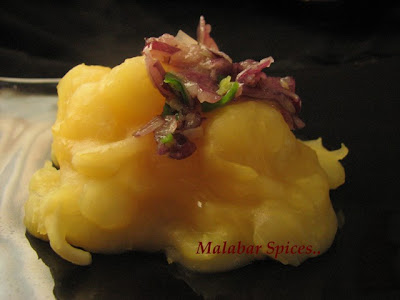
Kappa-Ulli Chammandi/ Mashed Tapioca with Spiced Shallots

Kappa

My sister made this during our recent vacation as an instant evening snack and we were impressed by the simplicity of the dish. This is more prevelant in the southern part of Kerala (as we Malabaris probably look for a fish or meat curry to go with it.:)) and is a legacy from her MIL's kitchen. Very addictive combination as the blandness of the tapioca is offest by the searing spice of the shallots and green chilies. You start off with the light flavored tapioca and then the shallots make you teary eyed and you reach for more tapioca.
You will need:
Tapioca or Cassava-2
Water
salt to taste

Boil water in a big pot. Peel and wash 2 small tapiocas. Follow Injimanga's tutorial on how to peel tapioca if you are new to the concept. Cut into small even pieces.

Wash and add to the boiling water with salt and a pinch of turmeric. There should be a inch of water above the level of the tapiocas. Cook until it breaks when pressed upon by the back of a spoon. This would take about 10-15 minutes depending on the quantity.

The tapioca back in Kerala would need to be pressure cooked but the western versions seem to cook real fast. Add more water if needed. When it is cooked, drain the excess water leaving just about 1/2 a cup of liquid still in and smash it alltogether to make it a slighly lumpy but even textured mass. Adjust salt as required and remove onto serving dish.

Ulli Chammandi/ Spiced Shallots
Shallots-5 or 6
Green Chili- 3
Sea Salt- 1/4 tsp
Coconut oil/ oil-1 or 2 tbsp

Peel the shallots and crush it with the chilies and salt till combined. Pour oil over it. Any oil is good but coconut oil tastes good and so does light olive oil. Add more salt if needed and serve with tapioca. The chammandi also goes well with dosas and idlis.

Related Posts:
Injimanga's Kanthari Chammandi and Dried Tapioca Curry
RP's Kappa w/ Fish Curry
Annita's Kappa Kuzhachathu

Don't forget to check out my post at The Daily Tiffin.

December 03, 2006

Request A Recipe.....

Most of the time, I just blog on whatever is cooking in my house or whatever catches my fancy. It could be a new cookbook, a vegetable from the farmer's market, a grilled item, a style of cooking or something I ate and just want to replicate. If I like something at someone's house, I always ask for the recipe and most of them part with their trade secrets willingly (he he some unwillingly:)). So I have a collection of my favourite recipes now. Also, each time someone asks a question, I learn something new. So I am welcome to suggestions to make the blog more interactive than a monologue on my part.

If you are looking for a recipe for a favorite dish, mail me a request, or respond as a comment to this post. Time permitting and if I am familiar with the dish/recipe, I will definitely try to post the recipe for you. Please be warned though, that I may not be able to respond to your request right away.