Showing posts with label On The Grill. Show all posts

March 19, 2008

Chicken Malai Tikka


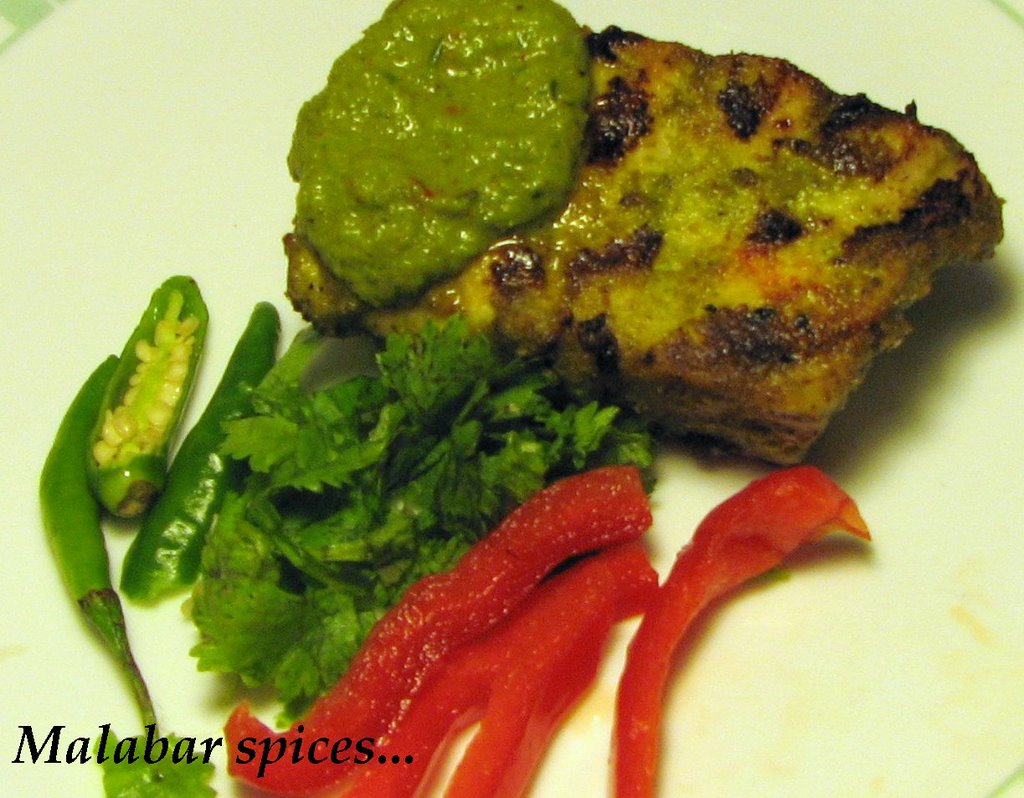
Some more soups were left to blog but I have no photos for them so decided to post them later. Meanwhile my family craved something spicy and meaty and so here it is...Chicken malai tikka.I am sure my readers in the metros in India have their favorite tikka/kebab corner, which they frequent regularly and hence wonder why we bother making this at home.

If I could access Nizamuddin, Karims, Delhi Durbar or Bade Miyan here, I would choose to just sit back and eat. But the food in the Desi restaurants here look reasonably desi, smell good but the food is a watered down version of the real thing. All color and no flavor. So when we meet up, my friends and I take turns making the grilled tikkas as appetizers and each of us have a wonderfully unique recipe.

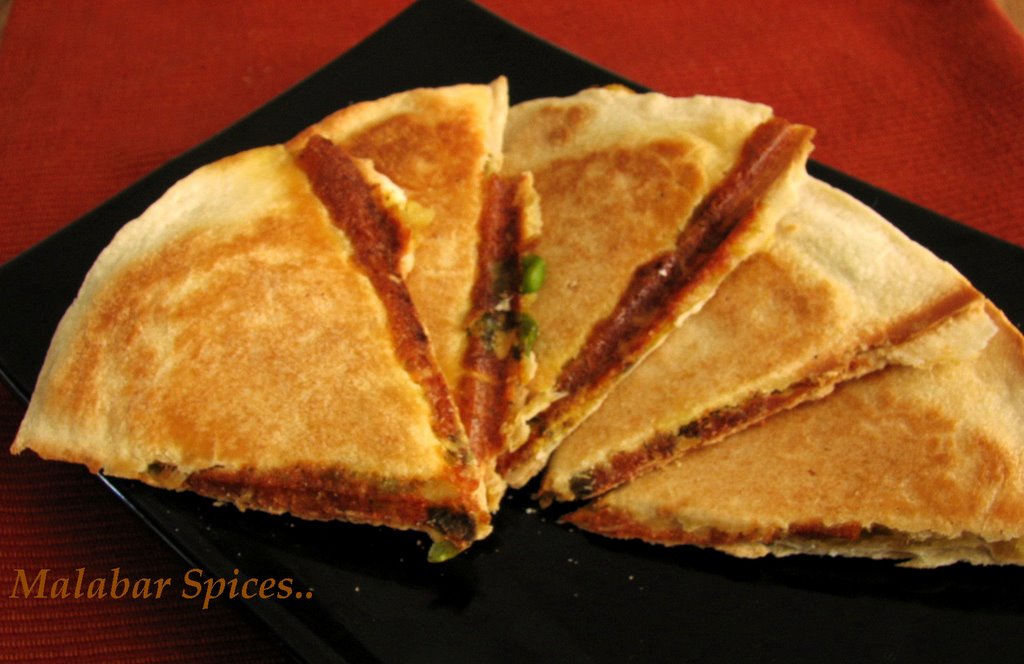
And on a week night, this is good for dinner....A green salad, some tortillas or pita and a tzatziki sauce or yogurt sauce, all wrapped up makes for a sumptuous meal.


This is one of the typical marinade for chicken kebabs or tikkas or whatever you want to call them. The names have been used interchangeably by everyone for small bites of chicken marinated in a yogurt based spice mix and grilled.The literal meaning of tikka is "pieces of chicken" and the word Kebab or Kabob is generally used for minced meat or cubes of meat on a skewer, usually marinated before cooking. The malai in the name comes from the addition of yogurt, sour cream or cream(malai) in the marinade and even butter to baste it. It adds a creaminess to the chicken's texture and makes it soft. Traditionally made in the clay oven, tandoor, the tikka is cooked surrounded by the high heat for a short time. It imbibes the smoky flavor and cooks fast, leaving it crusty outside and juicy inside.

In the summer I grill it on the backyard gas grill but all through winter, its done in the broil setting in my cooking range. (It does run up my gas bill though!!)

Since my version uses just a whole chicken cut up into small pieces, some with bone in it, I call it tikka. Kind of a smaller version of tandoori chicken. You could make it with boneless cubes too for ease of eating but the flavor is entirely different.. So its your choice, really. The boneless version is good for making chicken tikka masala, a very popular creamy chicken curry.

I have tried many recipes for the malai tikka, some with cream and some with sour cream or yogurt but this combination is what I end up using week after week. The others are really good too and when you do have sour cream or leftover cream at home, its great to use them but who wants to inject fat unnecessarily? So I stick to yogurt which is thickened and that gives it a rich flavor without too much fat. To make thick yogurt, hang the required amount of yogurt in a clean tea towel and place in a large strainer over a bowl. Leave it for as long as you need. After about a hour or more, the whey would have drained out leaving behind thick yogurt. You could also buy Greek yogurt instead and use that.

You will need:
A whole chicken cut up into small pieces. Use a 2 to 3 pound size one.
For the Marinade
Thick Yogurt-1 cup
Juice of 1 whole lemon
Ginger paste-2 teaspoon
Garlic paste- 2 teaspoon
Red Chili Powder- 1 and half teaspoon(Use less if you want it less spicy)
Paprika-3/4 teaspoon
Turmeric-3/4 teaspoon
Coriander Powder-1/2 teaspoon
Cumin Powder- 1 teaspoon
Garam Masala- 2 teaspoon
Cilantro - 1/2 cup finely minced.
Salt to taste
Olive Oil( traditionally butter is used, so u can use either.)-3 Tablespoons

Preparation:
Blend all the marinade ingredients in a blender . Marinate the chicken for at least 2 hours or over night in the refrigerator. Skewer the chicken on either wooden or metal skewers. I usually make it without skewering out of laziness and it tastes just as good. To keep bamboo or wooden skewers from burning, soak for several hours in water before using.

Outdoor: Clean the grill grating and oil with a cloth. Preheat to the maximum heat and grill for 15 minutes, trying not to keep turning them over all the time. Just turn once midway and baste with oil.

Indoor: Preheat the broiler or set the oven to the highest setting say 500 F. Place a grill grating on top of an aluminum foil lined tray. Brush with oil and spread the chicken on the grate. Grill for 7-10 minutes on one side and then turn them over.Total maybe 15 to 20 minutes. Baste with butter or oil in between if it looks too dry. The timings may vary based on your oven's heating and type so use your judgment. If the quantity of chicken is less, it will take less time. When they are done, the pieces would not stick to the grate and only a clear juice will run out.

Garnish with onions, cilantro and lemon wedges..enjoy! Serve hot with Mint Chutney.

Related Links:Mandira's Chicken Malai Kabab

August 11, 2007

Express Meals 1-Quesadillas


One of my express meals is quesadillas. Something I got introduced to only after coming here but due to its versatility, it just comes up in different forms on the dinner table. It can be a veggie quesadillas with peppers and mushrooms or with black beans and salsa..or even with leftover subji! The non vegetarian options are also plenty ranging from the bland to spicy. What's not to like about biting into melted cheese, spicy filling and a toasty crust?

Here are two of my easy breezy recipes.. the upper one made in a quesadilla maker and the lower one made in a cast iron skillet/tawa. I like both results but the quesadilla maker gives a hassle free- hands free experience and is hence preferred. But if you just make it once in a while, don't bother buying one... the Indian iron tawa is a natural skillet.

The tortillas used were spinach tortillas hence the greenish hue. Use any kind of melting cheese..cheddar, montery jack that can be grated, or a pre-made blend of grated Mexican cheeses.


Chicken Quesadillas
The recipe is for 2-3 people
You will need:
Peppers-2 or 3
Scallions- 2-3
Onion- 1
Green Chilies-2-3
Chicken cooked- 2 cups
Coarsely grated Monterey Jack cheese (With or without hot peppers)-2 cups
7-inch flour tortillas-6 to 8 (Use any kind of tortillas)
Cilantro-a handful
Mushrooms- 7-8 button (optional)
Pepper- 1/4 tsp
Salt to taste
Oil -1-2 tbsp
Fajita seasoning or Garlic Powder- 1/2 tsp,Paprika- 1/4 tsp, Ground Cumin-1/4 tsp

Preparation:
0-5 minutes: Keep all the veggies washed and ready. Heat a pan with the oil on medium heat. Coarsely chop a couple of colored bell peppers (green/yellow/red/orange) into tiny pieces.

Also chop the onion, scallions (spring onions), green chilies and mushrooms if you have any. (I didn't have any!)Use a chopper to speed up the cutting. Use just one veggie or all together. Wash and chop the parsley or cilantro. Use any leftover grilled chicken, shred it or cut into tiny pieces. The type of chicken marinade used for grilling changes the flavor of the quesadilla. YOu could even use boiled chicken or leftover rotisseri chicken.

5-8 minutes: Heat a pan with the oil, and saute all the veggies except the green part of the scallions and the cilantro. Add the chicken after a minute. If you have any ready made fajita seasoning, you could sprinkle that instead of the garlic powder, cumin and paprika. As soon as the veggies look wilted,turn off the flame and add the leaves. While it is cooking, grate cheese, preheat the quesadilla maker, and get the tortillas ready.

9-17 minutes: Lightly grease the quesadilla with olive oil on one side and place the oiled side down on the maker. Sprinkle with 2-3 tbsp of the mix, and then cheese and cover with the second tortilla. Toast for 2-3 minutes or as per the instructions. Remove and let cool before cutting. You could make 3 full quesadillas in 8 minutes. Use the waiting time to make a guacamole or salsa if required.


Three Pepper Quesadillas :
Saute thinly sliced (not diced now) peppers, onions, chilies (or jalapenos), with salt, pepper, and fajita seasoning or garlic powder and paprika. Or saute it as per the fajita filling I had previously blogged about.(Add chicken if you want to.) Add cilantro and a dash of lemon juice and salt. Make the quesadillas as before, alternating a layer of the filling and then cheese.

Skillet Quesadillas: Refer to this post for skillet version.

August 06, 2007

Grilled Chicken In Two Ways..

I have been on a veg kick for some time now and I usually don't like chicken. But then I got hold of a new book and my opinion has changed. A bad works man blames his tools...I wasn't grilling it right and now I know why.

Some of you must have seen the two books that I have on my side bar for some weeks now. I have been meaning to write about them but haven't gotten around to it as yet. They are my recent acquisitions from the library but so good that I keep renewing them. I guess I have to have my own copy now.


So today I will describe the second book: Chicken on the Grill: 100 Surefire Ways to Grill Perfect Chicken Every Time by Cheryl Alters Jamison. It has a lot of ways to grill chicken, and the book is nicely broken down to the recipes for a variety of cuts.. boneless, with bone, legs and thighs and whole chicken with detailed descriptions of how to grill each way.

Every section has a a bunch of neatly photographed and detailed recipes along with a myriad other variations of the marinade. There are dry rubs, marinades, sauces, brush on sauces..even condiments to be made with burgers and sandwiches.

I tried four recipes of which three were instant hits. The third was a chicken burger which was so good but it has no photo so can't be blogged about now. The fourth was a lemony garlicky chicken which I loved but was not as appreciated by the others. But here are the other two.

Every time the chicken was made, I made some extra which came in handy over the next couple of days for my express meals. Used as is or sauteed with your choice of vegetables and spices, it makes for great options on a weeknight.

Use only sea salt, not regular salt for both recipes. Sea salt is a broad term that generally refers to unrefined salt derived directly from a living ocean or sea. It is not fully refined as much as other kinds of salt, so it still contains traces of other minerals, including iron, magnesium, calcium, potassium, manganese, zinc and iodine which gives it a very different taste. I know its expensive but it changes the flavour dramatically. My grandma only uses sea salt and has a huge earthern ware pot with sea salt which we used to dip into to eat with mangoes. I believe this gives all her food a unique flavor. Crush it coarsely with a mortar and pestle.

6 things I make with leftover chicken:
1. Shred and add to noodles or fried rice or pasta.
2. Chop and add to the quesadilla mix while sauteing.
3. Use in a grilled cheese panini.
4. Saute with peppers for a hoagie or chicken cheese steak.
5. Roll it up in a tortilla wrap with lettuce, cheese and salsa or tacos.
6. Spice it up further to make instant chicken stir fry with rotis.

The Chicken Champ's Sunny breasts:(Don't go by the quirky name..its really good)
Preparation time is 5-10 minutes, keep aside for 15 minutes while the grill heats up and grill for another 10-12 minutes.


Dry Rub:
1 1/2 tbsp Dried Dill
1 tbsp granulated garlic
1 1/2 tsp coarse sea salt
1 tsp granulated onion.( I didn't have this, so never added it)
1tsp Parsley flakes
2 tsp Fresh Ground Pepper

4 medium skinless chicken breasts
2 tbsp cold unsalted butter (I used very little)
4 thick lemon slices
1 tsp sugar(I didn't add this either)
2 tbsp lemon juice diluted with 1 tbsp water (optional)

Preparation:
1. Prepare the dry rub by mixing all the ingredients together.

2. Wash, drain, and place the chicken in a plastic/zip lock bag and pound with heavy pestle or a glass all over evenly. This is to even out the thickness of the chicken.

3. Cut a thin pocket into the sides of the chicken with a sharp knife. Dunk each piece into the dry rub liberally making sure there is a thick even coating of the spices on both sides. Place small pieces of the butter in the pocket and spray the chicken lightly with oil.

4. Fire up the grill and while it heats up, let the chicken rest at room temperature.

5. When the grill is hot enough, wipe the grill with a oil soaked paper towel and place the chicken. Grill uncovered for 3 minutes, turn over and grill for another 3 minutes and then close the lid for 5 minutes. Turn once more and cook for 4 minutes. If your grill is the charcoal kind, you don't need to close the grill cover, but I feel more comfortable with the last bit of deep heat cooking. Drizzle with the extra dry rub and lemon juice and spray with oil at each turn. The chicken is ready when it looks white throughout and the surface looks nice and crusty.

Chicken Piri Piri
This is a Portugese recipe and the result is a spicy searing hot chicken with a mild interior. The name is derived from the fiery African dried red chilies used in the sauce.

Dry Rub:
3/4 cup olive oil
2 tbsp fresh lemon juice
2-3 tbsp dried red hot chili flakes
2 plump garlic crushed
1/2 tsp coarse sea salt

Preparation is similar to the above grilling. Just rub the marinade in generously and let it rest and then grill as above. If the grilling is to be done later, marinate and place in a zip lock bag in the refrigerator. This marinade migt be better with bone in pieces, but then the cooking time increases to 30 minutes to make sure it is fully cooked.


Grilling Tips From The Book:

COntrolling the temperature of the fire is the key to success. Chicken grills at a steady heat except when dealing with thighs and drumsticks. The best way to judge the heat is by holding your hand over the grate.(don't touch it though!)Count the seconds before you feel the need to pull away your hand..1-2 seconds means hot, 3-4 medium, 4-5 moderate. 7-8seconds..is the perfect temp for vegetables. (My grill is a gas burner so it really is not as great as a charcoal burner but it does give good results as I know how to handle it now.)
Before grilling, always make sure the grate is clean and scrub it with a metal brush.

Then carefully coat it with a thin layer of oil using a brush or cloth.(Spraying works but make cause flareups.)
Be Prepared with all the tools and ingredients. Time the grilling as you go along.

Check for doneness by using a thermometer(it is odne when the meat has 170 degrees internally or when the juices run clear, or cut and see if the center is white.) Normally we like it well done and crispy so that takes care of doneness.

DO not put too much sauce on the chicken as it will only burn and not let the inside cook well. Make sure there is no oil drippings as they may cause flareups. Do not keep turning the chicken as it needs to sear on one side to keep it from drying up.

So good luck and hope you guys have fun grilling.

June 06, 2007

Three Pepper Fajitas


It's always fun to sit back and smile as the guesses pour in just to see the versatality of everybody's imagination. Jackfruit in a fajita..the prize of originality goes to Sra while Nandita came the closest with yellow peppers. Still, thanks for being a sport.

Its a veggie fajita filled with sauted peppers, onions, cilantro, grated cheese and the optional sour cream and gaucamole. Yep, I did make some quesadillas too with the peppers and chicken but that's next on the posting list.

I buy the multicolored bell peppers from the price club on a regular basis just becacuse they look so good and they are so good for you. Every time, I go there the red, yellow and orange peppers just whistle charmingly to me as I walk past them, their colors making them stand out in the midst of all the vegetables. I force my eyes elsewhere, figuring I can go for a couple of weeks without them. But no,at the end of the shopping, there they are in my cart, and I am already conjuring up new ways to cook them.


So how good are they for you?

Brightly colored bell peppers, whether green, red, orange or yellow, are rich sources of vitamin C and vitamin A (through its concentration of carotenoids such as beta-carotene), two very powerful antioxidants. Red Peppers also contain lycopene, a carotenoid which aids the body in warding off cancer. Additionally, they are low in Saturated Fat, Cholesterol, and Sodium while being high in fiber, Vitamin E, Vitamin K, Vitamin B6, Potassium, Manganese, Thiamin, Riboflavin, Niacin, Folate, Pantothenic Acid and Magnesium. For more info, click here. Did I get any converts? Don't eat this if you aiming to gain weight coz as you read above, they are low in fat.

Sweet peppers are plump, bell-shaped vegetables featuring either three or four lobes. They usually range in size from 2 to 5 inches in diameter, and 2 to 6 inches in length. Inside the thick flesh is an inner cavity with edible bitter seeds and a white spongy core. Bell peppers are not 'hot'. They contain a recessive gene that eliminates capsaisin, the compound responsible for the 'hotness' found in other peppers. When sauted or grilled, they are sweet with a fruity flavor. Here I have sauted them for multiple uses.

You will need:

Bell Peppers-3, one of each color
Onion-1
Red Pepper Flakes-1/4 tsp (optional)
Garlic-1 clove
Olive oil-1-2 tsp
Cilantro- a handful
Lemon Juice-a dash
Salt to taste
Black Pepper-1/2 tsp
Grated Cheese-a handful

Preparation: Slice the peppers vertically along the edges so as to remove the central seed core. Slice them thin into equal size pieces. Slice the onion finely. Crush the garlic. Heat the oil in a skillet and add the garlic and red peppers. Add the sliced peppers and onions, salt and saute them while stirring all the while. Lower the heat to medium and cover for 2 minutes. Open, increase the heat and continue stirring. They should wilt and get cooked in about 5-7 minutes. The high heat is to evaporate the water that the peppers give out. Add lemon juice and pepper. Now they can be used as a topping for fajitas, quesadillas, or even burgers.

Fairly good flour tortillas are available in supermarkets almost everywhere. Select the ones which are 6 or 7 inches in diameter. Warm them up by on a skillet and wrap them in a cloth napkin to bring them to the table.

For assembling the fajitas: Lightly toast a tortilla on a skillet on both sides. Spread a tablespoon of the peppers on it. Add grilled strips of chicken or beef if so preferred. Sprinkle chopped cilantro, grated cheese and a spoon on sour cream. Roll or fold over..Done.

October 30, 2006

Potato Quesadillas Or is it Baked Samosas?


Ever since I started making quesadillas at home,the possibilities seem endless. Quesadilla literally means "little cheesy thing" and is a tortilla folded over shredded cheese and toasted till brown. It may also include cooked meat and/or peppers. So what is a tortilla? Simply put, its a flour or "maida" roti/chapathi. Our samosa is built similarly as that too has a layered flour cover with a spicy filling inside (now available with even cheese inside)but it is deep fried in oil to give it its characteristic flaky crust. Quite like the crispy fried taquitos called tacos dorados ("golden tacos") or flautas ("flutes"). (My son likes the tortilla filled with cheese and spicy sauce and deep fried.)
So is there a baked version of the samosa yet? Or a potato version of the quesadilla?
I tried it in the morning for breakfast with some leftover samosa filling and tortillas as I had run out of bread. When it is hot, it is crispy and crunchy with the spicy filling,and good even as an on the go breakfast. The deep fried purists (ha ha) may scoff, but it is definitely healthier and easier as an alternative whether its for snacking or a quick bite. I wouldn't recommend it cold, but then I like all food to be piping hot.
This can be made with any filling, potatoes, scrambled eggs, chicken, mushrooms... The sprinkling of cheese seals the edges together as it melts. The cheese also adds a dimension of gooeyness to make it feel rich and fulfilling.


You will need:

Potato- 1 medium sized one boiled
Onion-1 small one chopped
Frozen Green peas-1/2 cup defrosted
Red chili powder-1/4 tsp
Coriander powder-1/2 tsp
Cumin seeds-1/2 tsp (toasted and powdered)
Black Pepper-1/4 tsp
Turmeric-1/8 tsp
Garam Masala- 1/2 tsp
Cilantro leaves-3 tbsp chopped
Salt-1/4 tsp (to taste)
Lemon Juice-1/2 tsp
Canola/Vegetable oil -1 tbsp
Grated cheese- about 4-5 tbsp
Oil for brushing
6 small tortillas or 2 big tortillas.
Preparation:
1. Heat the oil in a deep skillet and add the onions. Sauté the onions for a few minutes and add the spice powders, stirring further to cook the powder. Add the peas and cook till the peas get cooked, without adding any water. Stir in the chopped potatoes, lemon juice, salt and cilantro leaves. Mix well and take it of the flame. It should be a dry mix. The potatoes should be dry. I normally cook it in the microwave as I can never get it to boil in water and yet be dry on peeling.
2. Heat the quesadilla toaster, brush surface with oil, place one tortilla on one side and spread the filling evenly, leaving space at the edges for it to seal. Sprinkle about a tablespoon of grated cheese or more evenly and place the second tortilla on top. Brush the top surface also with a dab of oil. Close the toaster firmly and let it toast for a minute or two as needed. Cut into wedges and serve warm with chutney of choice.
Non Toaster Option- If you don’t have a tortilla maker, don’t despair. Before I got one, I used to make the quesadillas with my cast iron pan (or skillet). Just brush the tortilla with oil or butter and toast lightly on both sides and keep. Once you have two of them, place one tortilla on the skillet, spread the filling and cheese and cover with the second one. Now press down on the tortillas with something heavy for a minute till the cheese melts and starts sticking. Cook on one side for a minute or two, flip over and repeat till it gets toasty.

This is my entry for For Nandita's Weekend Breakfast Blogging WBB-6 - Twist in the plate.

Other Vegetarian Filling Options:
Mushrooms and cheese; Paneer, scallions and Peppers; Corn and cheese

, , , ,

September 09, 2006

WHB 1-Spicy Chicken Kebabs

The chilies from my garden are finally maturing after being green for over 40 days. I had almost given hope, initially not knowing that they need the hot summer sun to let their fiery capsaicin loose.The Scotch bonnet and Habanero Chilies are different pod types of the same species. They come in different colors, ranging from chocolate to yellow. My scotch bonnet chilies are an inch long, pale orange in color and oval in shape with a pointy tip. They are slightly sweet yet intensely hot. My previous post on the chili itself desribes its characteristic and has some rustic garden photos.
Scotch Bonnets from my garden were plucked and waiting for its time in the limelight. A special chili like Scotch Bonnet chili needs a special recipe that highlights its spicyness centerstage. Something like a Kabob/Kebab with a simple blend of flavors exploding in each bite.
A Kebab is minced meat on a skewer or meat cubes marinated in an array of spices and grilled. Kebab is usually made of lamb and beef, although chicken and fish can be used for some styles. The word kebab means “to roast,” which is what grilling is, properly speaking. Kebabs originated in Turkey but spread through the Middleeast to Asia. There are many varieties of Kebabs, as listed partially in Wikepedia.
My kebabs are from an Arab recipe but I added the sweetness of a Red bell pepper to balance the heat of the chilies. The scotch bonnet can be substituted by 5-6 green chilies or 2 jalpeno peppers. The Kebabs go well with Pita bread and White Sauce.
I am also sending this to the entertaining and educating Weekend Herb Blogging hosted by Kalyn's Kitchen.

You will need: (makes about 10 kebabs)
Boneless Chicken Breast- 1 lb
Red bell Pepper- 3/4 of a whole pepper (1 cup chopped).
Onions-1/4 cup chopped finely
Scotch Bonnet Chili- 1/3 or more as per taste.(substitute any hot chili)
Black Pepper- 1 tbsp
Garlic -4 cloves
Parsley/Coriander leaves- 1 cup chopped
Lemon Juice- 3 tbsp
Spice Mix-1 1/2 tbsp
Olive oil-3 tbsp
Salt- 3/4 tsp
Metal skewers-Thick square ones.
Spice Mix:
Cinnamon-1 piece
Cardamom- 4-5
Cloves-7
Nutmeg- 1/2 tsp
Cumin seeds- 1 tsp
Dry roast and grind all together and keep aside.

Preparation:

1. Wash the chicken breast and pat dry with paper towel, until completely dry.
2. Cut into small pieces and mince in a chopper in batches. Without adding any water, pulse for 1-2 minutes for each batch. Remove the minced meat into a mixing bowl. If there is any moisture, the kebabs would not hold together. So it is important to ensure that the chicken pieces are dry before mincing.
3. In the same chopper, now finely chop the red bell pepper (without seeds and core), parsley/coriander, onions, and chilies and add to the chicken. Add all the other ingredients and mix with hand or fork till well blended. Keep aside for at least one hour. The more the marinated time, the better it will be. It can even be marinated overnight in the refrigerator.
4. Grease your hands with a bit of olive oil and gather lemon size ball of the minced meat and shape it into a small tube. The oil is to keep the meat from sticking to the hand. If your hands start getting sticky, wash them well, dry and apply a new layer of oil before rolling again. If you have the thick square skewers, the kebabs should be chorded onto it along its length. Else, just insert a regular skewer through the length and remove it. It is not easy to make it hold on to the regular metal skewers as it falls apart when it cooks.
5. Preheat the grill to 300 degrees. The kebabs can be put directly on an outdoor grill, but if doing in an oven, line a tray with aluminum foil and spray a film of oil.
6. Place the kebabs on the grill and cover it to cook for 5-10 minutes. Turn only once after 5 minutes and do not keep opening the grill. Maintain heat at 300 degrees.
7. Serve hot with Yogurt-Mint Dip(chutney) described below and Pickled onions.

Yogurt-Mint Chutney:
Coriander leaves-1 cup
Mint leaves(pudina)-1 1/2 cup
4 green chillies
Garlic-3 cloves
Lemon Juice-2 tbsp
Plain Yogurt-4 tbsp
Salt as per taste
Preparation:
Wash and chop the coriander. mint leaves coarsely. Put all ingredients except yogurt in a small blender. Blend till smooth. Add very little water if required. Remove with a rubber spatula. Add the yogurt and taste. Add more salt if needed. Stays fresh for 3-4 days with yogurt and for 2 weeks without yogurt.
, , ,

July 15, 2006

Spicy Grilled FIsh/ Chutta meen


My first contribution to the simple series is a grilled fish. Marinated in a spicy blend of green chilies, parley, garlic, lemon juice and salt.

You will need:
Fish – 1 lb or 4 pieces. Any fish fillet or steak pieces (Tilapia/ Tuna/ Catfish/ Swordfish)
Garlic - 5 cloves.
Green chilies – 14 small ones (use less for less heat)
Lime juice- 4 tbsp
Olive oil – 5 tbsp
Sea salt – to taste
Parsley/ Coriander leaves – 1 bunch (enough to make 1 cup after grinding)

Preparation:
1. Wash the fish and keep aside. You don’t need to wash it if it is fillets.
2. Grind all the ingredients together with oil and lime juice. Don’t add water unless it is too dry. It should be smooth with a chutney-like consistency. Taste and add more salt /lemon juice as suited to your palate.
3. Marinate the fish pieces in this blend for an hour or more in the refrigerator.
4. Preheat grill to 350 F. Or use the broiler in the cooking range.
5. Use foil or a nonstick tray on the grill. Spray/ brush a layer of oil on it and lay the fish fillets gently.
6. Grill on each side for 5 minutes or so. Turn over and sear the other side. The cooking time varies with the fish. The tuna steaks took about 8 minutes on either side.
7. Serve with a wedge of lemon and some mint chutney on the side.