October 30, 2006
Potato Quesadillas Or is it Baked Samosas?
Ever since I started making quesadillas at home,the possibilities seem endless. Quesadilla literally means "little cheesy thing" and is a tortilla folded over shredded cheese and toasted till brown. It may also include cooked meat and/or peppers. So what is a tortilla? Simply put, its a flour or "maida" roti/chapathi. Our samosa is built similarly as that too has a layered flour cover with a spicy filling inside (now available with even cheese inside)but it is deep fried in oil to give it its characteristic flaky crust. Quite like the crispy fried taquitos called tacos dorados ("golden tacos") or flautas ("flutes"). (My son likes the tortilla filled with cheese and spicy sauce and deep fried.)
So is there a baked version of the samosa yet? Or a potato version of the quesadilla?
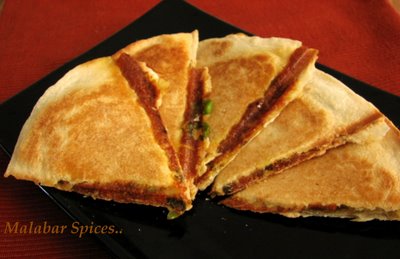
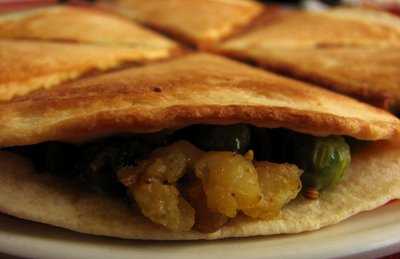
I tried it in the morning for breakfast with some leftover samosa filling and tortillas as I had run out of bread. When it is hot, it is crispy and crunchy with the spicy filling,and good even as an on the go breakfast. The deep fried purists (ha ha) may scoff, but it is definitely healthier and easier as an alternative whether its for snacking or a quick bite. I wouldn't recommend it cold, but then I like all food to be piping hot.
This can be made with any filling, potatoes, scrambled eggs, chicken, mushrooms... The sprinkling of cheese seals the edges together as it melts. The cheese also adds a dimension of gooeyness to make it feel rich and fulfilling.
You will need:
Potato- 1 medium sized one boiled
Onion-1 small one chopped
Frozen Green peas-1/2 cup defrosted
Red chili powder-1/4 tsp
Coriander powder-1/2 tsp
Cumin seeds-1/2 tsp (toasted and powdered)
Black Pepper-1/4 tsp
Turmeric-1/8 tsp
Garam Masala- 1/2 tsp
Cilantro leaves-3 tbsp chopped
Salt-1/4 tsp (to taste)
Lemon Juice-1/2 tsp
Canola/Vegetable oil -1 tbsp
Grated cheese- about 4-5 tbsp
Oil for brushing
6 small tortillas or 2 big tortillas.
Preparation:
1. Heat the oil in a deep skillet and add the onions. Sauté the onions for a few minutes and add the spice powders, stirring further to cook the powder. Add the peas and cook till the peas get cooked, without adding any water. Stir in the chopped potatoes, lemon juice, salt and cilantro leaves. Mix well and take it of the flame. It should be a dry mix. The potatoes should be dry. I normally cook it in the microwave as I can never get it to boil in water and yet be dry on peeling.
2. Heat the quesadilla toaster, brush surface with oil, place one tortilla on one side and spread the filling evenly, leaving space at the edges for it to seal. Sprinkle about a tablespoon of grated cheese or more evenly and place the second tortilla on top. Brush the top surface also with a dab of oil. Close the toaster firmly and let it toast for a minute or two as needed. Cut into wedges and serve warm with chutney of choice.
Non Toaster Option- If you don’t have a tortilla maker, don’t despair. Before I got one, I used to make the quesadillas with my cast iron pan (or skillet). Just brush the tortilla with oil or butter and toast lightly on both sides and keep. Once you have two of them, place one tortilla on the skillet, spread the filling and cheese and cover with the second one. Now press down on the tortillas with something heavy for a minute till the cheese melts and starts sticking. Cook on one side for a minute or two, flip over and repeat till it gets toasty.
This is my entry for For Nandita's Weekend Breakfast Blogging WBB-6 - Twist in the plate.
Other Vegetarian Filling Options:
Mushrooms and cheese; Paneer, scallions and Peppers; Corn and cheese
Quesadillas, Potato, Food Blog, Samosa, Vegan
October 29, 2006
October 25, 2006
Chicken Varattiyathu/Chicken Stir Fry
This is a yummy chicken recipe, spicy, hot and yet crunchy with all the pieces of cut dried coconut flavoring it. The recipe is originally Shynee’s Chicken Varuthathu which I had all liked for its intensity. Thanks Shynee!!!! It reminded me of the chicken dishes I had in the resort restaurants in the Backwaters and Wynad, Kerala.
Shallot, which is the main ingredient in this recipe, has a delicious peppery bite to it. Unlike onions, adding a lot of it to a dish doesn’t make it sweet. It still has a distinct flavor even after caramelizing. I made this recipe with just shallots for the family, but when I tried it as a party recipe, I realized the most time consuming part of the recipe is cleaning a whole lot of shallots. So, even though the taste comes form the shallots, I used fewer shallots and increased the quantity of onions. It works just as well to add the shallots in the end as then the flavor is not cooked away. Also I used the ready dry coconut thin cut rounds and chopped it up instead of whole dried coconut. Since I modified certain parts of the recipe, I have to write it down again.
Try it either way; it’s a winner for those who like chicken and spicy food. Tastes good as an appetizer, as a side dish with rice or with breads. The combination of spices succeeds in getting rid of the fatty flavor that sometimes overwhelms the chicken. The chicken I used instead of boneless breasts is Halal chicken, cut up into small pieces; which I feel has a better flavor and texture. Try to make it with quite small cuts of chicken or boneless breasts so that the masala adheres well.
You will need:
Chicken -1 ½ lb (chopped into small pieces)
Indian Shallots-2 cups peeled (chopped) The more the merrier!!
Red Onion-2 large-chopped fine
Tomato-2
Dried Coconut (Copra)-1 half-cut into small pieces
Ginger-2 inch piece
Garlic-8 large cloves
Green chillies-8
Red Chili powder-2 tsp
Pepper powder-2 tsp
Coriander powder-2 tsp
Turmeric powder-1 tsp
Garam Masala Powder: 2 tsp
Fennel seed powder-1 tsp
Fenugreek Powder-1/4 tsp
Lemon Juice- 2-3 tbsp
Curry leaves-2 sprigs
Cilantro leaves- 1 handful chopped.
Salt-as required
Canola /Olive Oil-as required
Preparation
1. Wash the chicken and lightly toss it with lemon juice and rinse again. Drain well onto a slotted drainer. Marinate chicken pieces with a little turmeric powder, chili powder and salt and keep it aside for 30 minutes.
2. Slice the shallots and onions finely and dice the tomatoes. Keep the shallots separate. Grind the cleaned ginger, green chilies and garlic to a fine paste. Keep all the spice powders ready.
3. Heat about 3 tbsp oil in a large shallow pan; add the curry leaves and shallots. Fry the shallots till they start turning a little brown and drain onto paper towels. (Keep aside to be added in the end.)
4. In the remaining oil, sauté sliced onions for about 3-4 minutes on medium heat and immediately add the ground ginger garlic paste, and saute well. Add some more oil (about 2 tbsp) if the onions are sticking to the pan. Then add the chicken, coconut cuts, tomatoes and spice powders and sauté on high heat for a couple of minutes. Do not add any water. Then lower the heat, cover it, and let it cook for about 10 minutes. This is just to cut down on frying time. Take care not to overcook it. The chicken will still have a bit of cooking left which is taken care of by the next step. Open and add salt and now keep stirring till all the water evaporates and the chicken browns evenly.
5. As it gets cooked and the extra liquid evaporates, the curry gives out the excess oil and the chicken and spices get further fried in that. Now add the previously fried shallots and mix well. At this point, it is important to keep stirring on high heat to let it fry all over. No need to add more oil, unless there is absolutely no oil let out by the chicken. The fried shallots also give out oil. This should anywhere between 10-15 minutes depending on the quantity and size of chicken pieces.
6. Check to see if the chicken is cooked. Add some more chopped curry and coriander leaves, sprinkle 1 tsp of lemon juice over the chicken and adjust seasoning.
Food BLog, cChicken, Kerala Recipes, Malabar Recipes, Chicken Stir Fry, Low Carb Recipes,
October 23, 2006
Eid Mubarak
October 21, 2006
Kozhi Ishtoo/ Chicken Stew w/ Coconut Milk.
Cooking time: 20 mins Preparation time is another 10 mins
You will need:
Chicken-1 ½ lb, (700gm) cleaned and cut into small pieces.
Onions- 2 medium sized ones
Potatoes-1 large one
Tomatoes-1 small plum tomato
Turmeric powder – 3/4 tsp
Coriander powder- 2 tsp
Fenugreek Seeds-1/4 tsp
Black Pepper Powder- 1 tsp
Whole spices: 1”long Cinnamon stick, 3 cloves, 2 cardamom
Lemon juice-1/2 of a lemon (1tbsp)
Plain Yogurt- ½ cup beaten
Coconut milk- 1 1/2 cup
Leaves: Coriander, Mint, Curry leaves, each a small handful, chopped
Salt - to taste
Oil-2 tbsp
White/Idaho Potato-1
Ground paste:
Green chilies - 10
Garlic – 3 cloves (1 ½ tsp)
Ginger- ½ inch piece (1 tbsp)
Fennel seed- 1 tsp
Poppy seeds- 1tsp
Cashew nuts-3-4
Preparation:
1. Wash the chicken and lightly toss it with lemon juice and rinse again. Drain well onto a slotted drainer. Slice the onions finely and dice the potatoes and tomatoes. Mix ½ cup of coconut milk with 1 cup water to dilute it and keep aside.
2. Soak the poppy seeds, cashew nuts and fennel seeds in ½ cup warm water for half hour and then wet grind it with the cleaned ginger, garlic and green chilies to a fine paste.
3. Heat the oil in a large shallow pan, add the whole spices. Sauté till the fragrance fills the air and then add onion.
4. Fry onions till just slightly transparent and immediately add the ground paste, spice powders and saute well. Then add the chicken, potatoes, lemon juice and sauté on high heat for a couple of minutes. Then lower the heat, add the diluted coconut milk, salt and cook covered for about 10 minutes or till the chicken gets cooked. Keep checking and add a little bit water if it starts sticking to the pan.
5. Check to see if the chicken is cooked. Add the chopped leaves, the thick coconut milk and the tomatoes. Allow it to simmer just for a couple more minutes and then switch of the flame. Add the beaten yogurt and adjust salt seasoning.
Serve hot with pathiri, appam, bread, puttu or just paratha.
If keeping for more than a day, try to keep aside the stew before adding the second coconut milk as its taste changes for the worse with each passing day. If the curry without the milk is reheated and then fresh coconut milk is added, it tastes just as fresh as the day it was made.
Food BLog, Chicken Stew, Kerala Recipes, Malabar Recipes,Coconut Milk Recipes, Kozhi Ishtoo Fry,
October 19, 2006
Bhindi Pakoda/ Stuffed Okra Fritters
Okra/Bhindi fry is one of my favorite veg dishes,hmm... along with phulkas/rotis and a cucumber raita, it is the lingering taste of summer. But Okra dipped in besan/gram flour and fried is definitely not reminiscent of hot days.
The fall weather is making me throw off my low oil diet by craving for something fried, something spicy and something tangy. Dipping it in gram flour converts it to be so crisp and crunchy that even my son( who only eats okra because its his friend's favorite vegetable)was not hesitant in trying it. The spicy-sour stuffing inside saves it from being bland once you are past the crispy coating. The original recipe from my mom calls for dried mango powder(aamchoor) but I had to adapt and substitute with lemon juice as my better half doesn't like the taste of amchoor.
Try it next time you are making stuffed okra. The mix inside is the same.My friends have made it stuffed with chaat masala too, or cut and dipped in a paste of chaat masala mixed with gram flour. Let me now if you have similar recipes with okra.
You will need:
Okra/Ladies Fingers: about 15
1/2 tsp. Dried Mango powder (Substitute with 2 tsp lemon juice)
1/4 tsp. Ground cumin
1/4 tsp Garlic salt
1/8 tsp Turmeric
1/4 tsp Red chili powder
1/2 tsp Salt or to taste.
Oil for frying
For coating:
3-4 tbsp Gram flour( Besan/ Kadalamaavu)
3 tbsp water and a pinch of salt.
Preparation:
If using whole cumin and coriander, dry roast it in a skillet till the aroma is released and then dry grind it. Mix all the dry spices with the lemon juice to make a thick paste.
Wash okra and wipe it completely dry with a kitchen towel or paper towels. If there is any water, it will become lacy while cooking. Slit each okra vertically half way down its length. Stuff each one with some of the spice paste, with your fingers, pushing the spices in, taking care not to split it into two pieces.
Make a semi thick paste of the gram flour, salt and water. It should be as just thick enough to coat the okra with a thin layer.
Heat some oil for frying and when it is medium hot, dip each okra in the flour paste and slide into the hot oil. How many can be fried at a time depends on the size of the pan or wok used. Fry for about 3 minutes on each side or until it turns golden brown all around. Maintain medium high heat throughout. Dip the okras in the flour paste only just before frying, otherwise it will become clumpy.
Drain onto paper towels and sprinkle with some coarse powdered sea salt.
Stuffed Okra Subji:
Additionally, you will need
Garam Masala: 1/4 tsp
Onion-1 medium sized one
Cilantro leaves- 1/4 cup chopped
lemon Juice-1/2 tsp
I can make this only when okras are fresh and tender. Try to use tender thin okras which do not have thick seeds as they don't cook easily and tend to get hard.The spice powders used in this recipe are the same, so I am continuing the post.
Use the same proportions of the spice mix and stuff the okras as explained. Only difference is that try to get as much stuffing in as possible. You may need to double the quantity of spice powders as more will be used for same quantity of okras.
Slice an onion thinly and saute over medium heat in 3 tbsp oil. Did I hear adouble take? Well, okras are known to be oil drinkers, so the more the tastier. Traditionally, this should be made without covering, on open flame in lots of oil.
Add the okras almost immediately to the onions and stir fry for about 2-3 minutes on high heat till the lacy threads of the okra leaves it. It is important to do this on high heat. ONlY after that, add lemon juice, cover and cook on medium heat for 4-6 minutes. Open and taste. If it is cooked, again saute it on high heat to dry it out and make it crispy. When it looks sufficiently brown, remove from flame and sprinkle garam masala and cut coriander leaves.
If you have the patience to hover around the stove top, you can reduce the oil. In that case, lower the heat, cook it covered and add more oil only if you see it sticking to the pan.
October 16, 2006
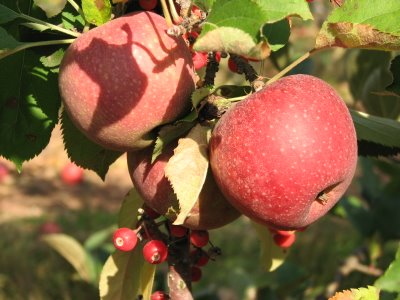
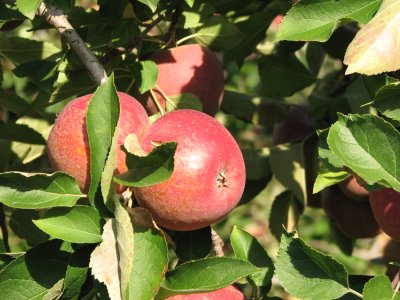
Can anybody guess what this is? Baby Apples
We went Apple Picking near Princeton,NJ over the weekend. A bit late as most of the yummy apples were already finished but even then, a day at the orchards and farm stand was fun. You pick and taste and eat and pay for what you take home.
Baby Empire Apples.. They taste like gooseberries and even have seeds in them. I wouldn't have guessed them if I ahdn't seen and tasted it.But it was interesting to see the range of guessing.Thanks to all who played.
This is what the babies want to grow up to be. Wine Sap Apples
Empire Apples.A little sweet and a little tart.I learn about the different kinds every year and then forget it slowly.
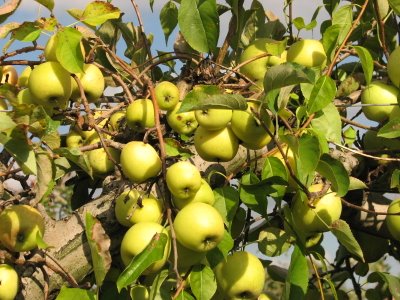
Golden Delicious..but small ones as the season is almost over.
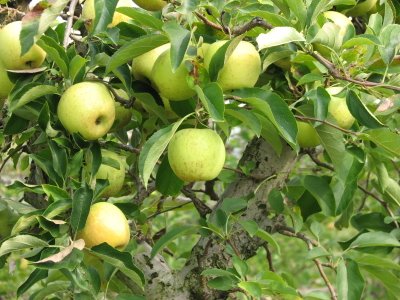
Granny Smith Apples.
A bagful of colors.
Apples being dipped in caramel and then M n Ms or nuts.
Candy apples laid out to dry, before being packed.
We like it raw, ripe and tart
we like it baked or cooked
Just one of the colors now in the cart
Though its much bigger when its picked.
October 15, 2006
October 14, 2006
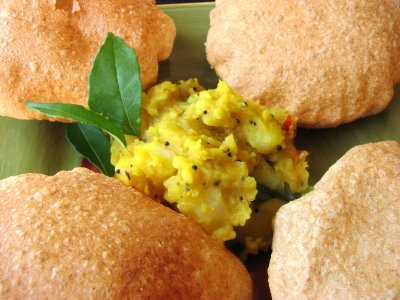
Puri-Bhaji/ Fried Bread with Mashed Potatoes.
Our weekend breakfast, brunch or early lunch...Puri Bhaji is my easy, no frills yet feel good meal. I like to make this but prefer eating the puris with bananas mashed in sweetened milk. A remnant of my childhood habits. Hot fried puris, straight of the flame is definitely comfort food. Here, with me rolling and frying,(and photographing now),I tend to get them not as hot.(But I start eating one rolled up with sugar, while the others are being produced.)
I know a lot of people like to eat it with Aam Ras(mango pulp), but a simple gingery potato or banana milk is my favorite combination. The excessive ginger in this recipe is supposed to relieve the indigestion produced by potatoes. Optionally, add a couple of cherry tomatoes along with the potatoes.
You'll need: For about 10-12 puris
Whole wheat flour- 1 1/2 cups
Water- ¾ cup more or less.
Oil -1 tbsp
Salt-to taste
Oil for Frying-1-2 cups
Preparation:
1. Add salt and oil to the flour and make it crumbly. Add water a bit at a time to make dough. Knead well for about 5 minutes till everything comes together.The dough should be smooth but medium hard in texture. Knead it well to make a smooth roll. Cover with a plastic wrap and keep aside for 15 minutes. Divide into even sized balls...about the size of a very small lemon.
Roll it out to a small circle and fry it. Do not roll out more than 2-3 at a time as it hardens if it is not fried immediately. Heat oil in a wok/kadai/cheenachatti/ and when it is hot, slide one puri in from the side. Press down with the slotted spoon to allow it rise completely and then turn over and cook the other side till golden flecks appear on both sides. Remove and drain onto paper towels.
P.S: Do not roll it out too thin. Test the temperature by dropping a speck of dough in the oil and seeing how fast it comes up. The heat should be medium hot consistently.
Potato Bhaji
Potatoes-2 big ones diced into small pieces.
Onion-1 cup chopped coarsely
Green Chilies-6-7 chopped.
Ginger- 1 inch piece, chopped finely
Turmeric-1/2 tsp
Salt-3/4 tsp or to taste
Curry leaves- 1 sprig.
Mustard Seeds- ½ tsp
Oil-2 tbsp
Preparation:
Heat the oil in a heavy pan. After a minute, lower the heat and add the mustard seeds and cover till it finishes spluttering. Keep a safe distance if uncovered. Now add the curry leaves, and onions, green chilies and ginger.
Stir fry for a minute and then add the potato cubes, turmeric and salt. Add 1 cup water (enough to submerge the potatoes), and let it come to a boil. Now cover and cook on low heat for 10 minutes. Open and add more water if the potatoes are not cooked. When the potatoes are cooked, mash them with a potato masher or the back of a spoon. Check seasoning.
Serve hot with the puris.
Food BLog,Breakfast, Poori Bhaji,Fried Bread, Mashed Potatoes, Kerala Recipes, Malabar Recipes Kerala Recipes, Malabar Recipes,
October 13, 2006
The Spice Is Right-VII/ Garam Masala Mix
Every household has its distinctive spice mixes and when Habeas Brulee, the must see site for great photos and recipes, announced the theme of the Spice is Right VII as Seasons of love-spices and spice mixes, the first thought I had was this Mix which is also my mom's Biryani Garam Masala.
This is one of the spice mixes that I associate with the smells of my mom’s kitchen and the aroma of her cooking. If I do not have it on hand, I feel my kitchen is incomplete. For a long time, I did not trust myself to make the mix here, so had to have it roasted and powdered by my mom and sent to me via any friend traveling to Kerala. Then during her last visit, she made me learn it and make it under her guidance. (But I still make her sent it from home.)
So what is Biryani Masala? Is it the same as curry powder? No. It is a blend of whole spices lightly roasted to release its aromas and then powdered. The name comes from the hindi term "Garam Masala" which translates as “hot spices” and the term is used generally for whole spices. It is not spicy but has a pungency which if used carelessly can overpower the dish. It stays well in an air tight container for months, but if freshly ground, is a whole new experience. Then you only need a pinch to make a difference. It is similar to comparing fresh ground coffee made from beans and stored powdered beans.
Uses are only limited by your imagination. The main purpose of its being is Biryani, Rice layered and cooked with meat or fish or vegetables and baked to infuse the flavors together. Furthermore, we use a dash for any spicy Goat or Lamb curry, Chicken curry, where it holds its own and even comes out boldly against the strong chili powders and coriander smells. The gamut of the curries runs from the dry Beef Fry to Goat Stew. Adding a pinch in vegetable stew or Pilaf/pulav gives it richness beyond its humble vegetables. It is little different from the store bought garam masala as it does not have cumin, ginger, mustard etc in it.
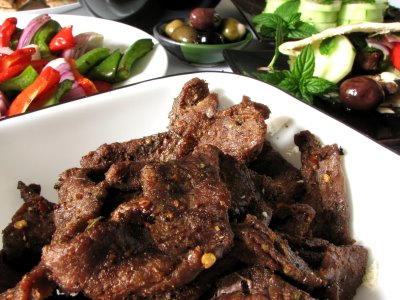
Mixed with lemon juice,salt, olive oil, garlic powder and pepper, it is an excellent marinade for beef and lamb chops giving it a semi mediterranean flavor. The recipe for the grilled beef is explained in my post on Grilled Beef Gyros.
Lastly but not the least, I use a teaspoonful to spice up my Banana Nut Muffins and Carrot-Date Cake instead of powdering nutmeg and cardamom. It cuts the smell of the eggs without the overpowering taste of the vanilla.
Biryani Masala:
Cinnamon(Karopatta)- 2 inch piece
Cardamom 8
Cloves(Karambu)8-10
Nutmeg (Jathika)-1/8 of a whole piece
Bay leaves- 1
Fennel seeds- 1tsp
Mace( Javithri/Jathipathri) 5-6
Caraway seeds/Shah Jeera- 1 tbsp
Star Anise-1
Dry roast all together and grind to a fine powder. Store in a tight lidded bottle and use only sparingly. This will yield 3 tbsp.
To roast, I usually use a cast iron skillet which holds the heat well without burning the spices. Keep the flame on medium heat, roast one ingredient at a time and keep stirring to distribute the heat evenly. This takes about 4-5 minutes.
Alternately, roast in the oven at 300 degrees for 5-10 minutes depending on tyhe quantity and size of oven.
Grilled Gyro Beef
You will need:
Lean Beef( Chuck Roast)-1 lb
Olive oil-3 tbsp
Lemon juice-1 tsp
Pepper powder- 1 ½ tbsp
Garlic Powder- 1 ½ tbsp or crushed fresh garlic.
Dried Oregano- 1 tsp
Garam Masala- 1 tsp
Sea salt- ½ tsp or to taste
Cayenne Pepper-1 tsp( or substitute with ½ tsp Red Pepper flakes)
The beef should be very thin slices. Get a thick piece of lean meat and freeze it for 10-15 minutes. Any roast beef should work. The freezing makes it easier to work with and slice thinly. Now slice across the grain, very finely. Across the grain means cutting across the fibers, not along the length. Wash and drain well.
Marinate the beef with all of the above spices for at least 1 hour. Brush the grill or oven proof tray with oil and spread the beef on it. Grill covered at 300-350 degrees Fahrenheit for 5-7 minutes on each side. Avoid opening the grill repeatedly.
Alternatively, broil in the oven under direct flame for 4 minutes on each side. The grilling time varies with each grill’s temperature so keep an eye on it and reduce or increase time as needed.
I like it medium done so if you want it rare or well done, change time in the grill as needed. The beef should be cooked at high heat for as little time as needed to avoid from drying out. Stay close while grilling. (I have enough experience in it getting charred in the blink of an eye).
Serve with store bought or with Nabeela's home made Pita Bread, olives, hummus and salad.
Spicy Garlicky Hummmus
You will need:
Chick peas-1 1/2 cup cooked
Sesame seeds- 3/4 cup or substitute 3/4 cup Tahini
Garlic Cloves-3 or 3/4 tsp garlic powder
Lemon Juice- 2 tsp
Olive Oil-1/2 cup( Keep aside 2 tbsp oil for garnish)
Red chili powder or pepper flakes-1/2 tsp
Oregano- 1 pinch
Salt –1/4 tsp or to taste.
Paprika-1/4 tsp for garnish.
Fresh Parsley chopped- ¼ cup
Preparation:
Wash the canned chickpeas and drain to get rid of its liquid. In a food processor, first blend the sesame seeds with the lemon juice, till it becomes a paste. Then add everything else except the oil and blend.
It is supposed to be thick and smooth so pulse and then blend without adding water. Add a bit of the oil to keep the blades running. When there are no chunks left, with the processor running, add the oil in a stream gently. This aerates the hummus and gives it its creamy yet light texture.
Adjust the seasoning and scrape into a bowl. Make an indentation in a circle and pour the remaining oil in it. Garnish with paprika and chopped fresh parsley.
Related Posts: Trial and Error's Hummus.,Saffron Trail's Hummus
October 11, 2006
Fish Molee/Fish Stew with Coconut Milk
Fish molee is a very light fish stew, flavored with coconut milk. Maybe the name 'molee' is derived from the spanish word "mole" which means stew. Central kerala had a flourishing trade with the Portugese in the olden times, so a cultural exchange and local ingredients may have resulted in this recipe.
The stew derives its characteristic taste from the freshness of the fish, the coconut milk and the black pepper. Compromise on one and it becomes a cloying imitation of a fish curry. I wouldn’t recommend trying this stew with the canned coconut milk at all. The canned coconut milk has the stale aftertaste of rancid coconut oil, whereas anyone who has used the milk from fresh coconuts will vouch for its light taste and texture. If I don’t have fresh milk, then I use the coconut milk powder and mix it in low fat milk instead of water to get a creamier texture.
This is the Malabar version of the stew, with a little bit more spice. Traditionally made for breakfast with lacy pancakes (appams) or bread in south Kerala Christian homes, we have it with rice breads (Pathiri) or steamed rice cakes (Puttu) also. My mom fries the fish a bit so that it doesn’t break up in the cooking process, and now I like the slightly crisp flavor of the fish as opposed to the raw fish cooked in the stew.
And it does taste excellent with the rolls here.
Try it both ways and let me know which one you would vote for. I make it with black pompano(Pomfret) fish but any fish cut thin without too much skin should be good. The skin would give it a bitterness. It can be even made with shell fish or shrimps.
You will need: For the Marinade:
Pompano/Pomfret/King Fish/ Fish Fillets- 1 lb or ½ kg
Turmeric- 1/4 tsp
Red chili powder-1 tsp
Lime/Lemon Juice-1tbsp
Salt- ½ tsp
Oil- 3 tbsp
For the Stew:
Onion- 1or 2.
Green chilies- 6
Ginger-1/2 piece
Garlic- 1 clove
Tomato-1/2 tomato
Coriander powder- ½ tsp
Fresh Ground Pepper- 1tsp
Salt to taste
Thick Coconut Milk – 1/2 cup
Very thin coconut Milk- 1 cup (Dilute the thick milk with water)
Lime Juice or Vinegar-1/2 tsp
Curry leaves- 1 sprig
Coconut oil or Canola oil- 1or 2 tbsp
Preparation:
1. Preparing the Fish: Clean and slice the fish. Wash it and toss with lime juice. Pat dry the fish with paper towels and marinate with the salt, chili powder and turmeric for at least 15 minutes outside the refrigerator.
Heat the oil in a shallow pan till medium hot and gently pan fry the fish fillets for about a minute or two on each side, just until it changes color and firms up. This step can be skipped if the fish is very delicate or if you are using skinless fish fillets. Drain onto paper towels and keep aside.
If using fresh or frozen grated coconut, make two extractions of coconut milk. First extract 1/2 cup and then second 1 cup. Thin coconut milk is the second extraction with shredded fresh coconut and water which is considerably thinner than the thick milk from the first extraction. Keep aside. Slice ginger, garlic and onions. Slit the green chilies and chop the tomato into quarters.
2. Stew: Heat oil in a pan and sauté sliced onions, garlic and ginger, curry leaves. Add the coriander powder and continue stirring for a minute. Add the second extraction of coconut milk, lime juice and salt to taste. The thin diluted coconut milk will not separate, so when it starts to boil, add the sliced fish and cover. Cook on a slow heat for about 5-10 minutes.
When done, add the tomatoes and pepper; check taste and remove from the stovetop. The tomatoes should not get cooked and the pepper added in the end gives it an irresistible aroma.
3. Ensure that the heat is absolutely low or even off, before adding the thick coconut milk or first extraction of coconut milk. Do not let it come to full boil after that. You could continue simmering for another 5 minutes.
I use the claypot (Meenchatti) which holds the heat and continues the cooking even after I take it off the flame. Remove from fire and serve hot.
This curry’s taste is hinged on the fresh flavors so it may not taste the same the next day. This is not one for the long haul.
P.S. You cold even replace half the coconut milk with low fat milk to reduce the cholesterol factor. If it is good quality coconut milk, once the flavor is set, adding a lot more (for more gravy) will not increase the flavor.
Related Posts: Shynee's Fish Molee.
Fish Stew, Fish, Food Blog, Indian Recipes, Kerala Recipes
October 08, 2006
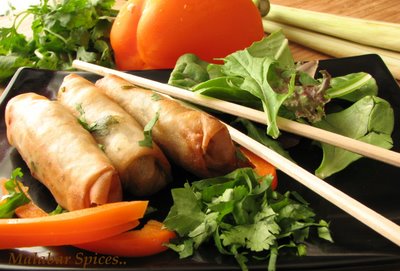
Spring Rolls..Chicken/Vegetable
Spring Rolls are made with pastries filled mostly with julienne vegetables (such as cabbages, carrots, or mushrooms). Some include semi cooked ground meat which is cooked in the steam while frying, while others have seafood in them. The filling is wrapped in a thin, flour wrapper, and usually deep fried. Pork is typically used for Vietnamese fried spring rolls.
Till recently I did not know how easy it is to make spring rolls, especially since here we get the wrapper ready to roll.
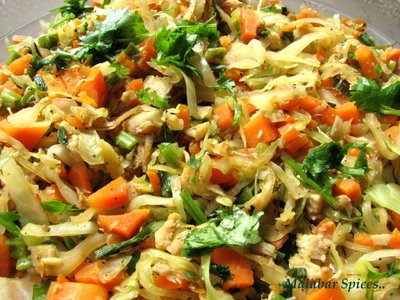
I had stopped ordering it from restaurants since they almost always contain pork. Here I did not try making it with semi cooked ground meat, instead just cooked the chicken lightly and shredded it.The vegetables are a creative combination, so feel free to change it. Just remember to keep the size of each vegetable very thin.
This appetizer tastes just as good without the chicken, with all the flavors and textures from the different vegetables.
Somebody suggested baking the wrapped rolls instead of frying so thats a healthy alternative. I used the 5 inch pastry sheets available in the Asian/Indian grocery stores.
Freezer Note: These rolls also freeze well. After making them, lay them quite seperated on a plate/tray and freeze them uncovered for an hour or so. When they are well frozen,they will not stick to each other. Remove them from the tray and pack them together in thick freezer bags. When you need them, defrost outside for half hour or microwave for a very short time (20-30 seconds) and then fry them.
You will need: For about 20 small rolls or 12 big rolls
2 small chicken breasts (Optional)
Carrots-1/2 cup cut into thin pieces.
Green chilies-3 finely chopped
Cabbage-1 1/2 cups very finely shredded
Coriander /cilantro- 1/4 cups finely chopped
Scallions/Sping Onion-1/2 cup very finely shredded
Bean sprouts-1 cup (Optional)
Cooked thin noodles- 1/4 cup cut into pieces.
Light Soy sauce-2 tablespoons
Garlic clove --1 finely chopped
Black pepper- 1 tsp
Salt-1/2 tsp or to taste
20 small spring roll wrappers
Vegetable oil for frying
Preparation:
1. Cut all the vegetables very finely along its length. They should be thin and almost of the same size. Cut the cabbage into half and slice it from the inside surface to make thin strands. The vegetables and spices have to be all cut up and handy before you fire up the pan. The cooking time is minimal so there is no time to stray from the pan searching for something. ( Which is what I end up doing most of the time.) If using chicken, cut chicken into medium sized pieces and cook with salt, 1 tsp pepper and 1 tsp soy sauce for about 7 minutes. When cooked, cut it or shred it into tiny pieces. Instead of chicken you could add cooked shrimp or mushrooms.
2. Heat 2 tablespoons of oil in a large shallow pan or wok and when it is very hot, stir fry the chicken. Then add all the vegetables and garlic for about 2-4 minutes. Keep stirring while the heat is high to distribute the heat evenly. The vegetables should not be cooked/wilted fully. Add the salt, pepper and soy sauce, stir thoroughly and check seasoning. Add more salt and pepper if needed. Do not put too much soy sauce. The cilantro and green part of the scallions(spring onions) should be added only after the pan is taken off the flame.Remove from heat and let it cool.
3. On a board, place 1 spring roll diagonally. Spoon about 2 tsp of filling on center half of skin. If using bigger wrappers, add more accordingly. Fold roll over filling, away from you tucking the point under filling. Fold side points over filling, and roll away from you toward the remaining corner. Moisten top point with a little water, folding over and pressing to seal.
4. Heat a deep skillet with oil, and fry spring rolls on medium heat until brown. If the oil is not hot enough, the spring roll will absorb more oil so maintain the heat. If it is too hot it will brown unevenly. Drain on paper towels. Serve hot with spicy sauce for dipping.
Sweet and Spicy sauce:
2 tbsp Rice Vine Vinegar or Regular Vinegar mixed with 1 tsp sugar.
3- 4 whole red chilies or 1 tbsp red chili flakes packed in oil.
1 tsp sugar
1 garlic clove
1/2 tsp soy sauce.
1 tbsp tomato sauce
Soak the red chilies in the vinegar for 10-15 minutes. Grind all the ingredients together. Add salt and sugar if needed.
October 06, 2006
Jeera Kanji/ Cumin Flavored Rice Soup
Jeera Kanchi is a cumin flavored rice soup, if described in the ingredient format. I always find it funny that our recipes have region specific names and the recipes names here read like a list of ingredients. But it is a good method to explain an unknown dish to the readers. Would you have looked at this post and thought of trying it out if it wasn’t named “Rice Soup”?
Jeera Kanchi is the traditional late night light dinner after breaking the fast and feasting on the goodies. After eating all the food in the evening, it is not easy to contemplate eating another meal. And then the insatiable thirst sets in. Cumin is a digestive aid and the starchy soup refills the body’s need for water and food.
It is made from white or red broken rice or rice bits. The rice used for Ghee Rice(Neichoru)is used commonly due to its tiny texture and fragrant flavor. I do not know what the name of this rice is, but anyone familiar with Calicut might be able to help me out here.
I have been getting requests for the Jeera Kanchi recipe and I was waiting to take a photo to post it. But the snaps are getting delayed so here is the recipe. The snaps will come over the weekend.
You will need: 4 servings
White Rice- 3/4 cups.
Coconut- 1/2 cup (grated)
Cumin seeds- 1/2 tsp
Turmeric Powder- ¼ tsp
Shallots (Small red pearl onions)-5
Oil- 1 tbsp
Salt to taste
Preparation:
Grind the coconut with the cumin, turmeric and 3 shallots into a very fine paste. Add water only as needed while grinding. Add 1/2 cup water (only if there is not much water in the coconut paste) and keep ready.
Wash and cook the rice in sufficient water till the rice is very soft (as in over cooked rice). If red broken rice is used, it is better to pressure cook it for 5-10 minutes. Add the ground coconut mixture and check the consistency of the gruel ( kanchi). Add more water if needed to make it a soupy consistency. Simmer on medium heat for about 10 minutes to allow the flavors to blend in and then remove from the fire. Add salt to taste.
Heat the oil and fry 2 chopped shallots till brown. Pour over the kanchi.
October 04, 2006
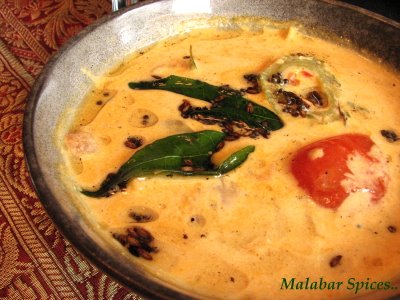
Pavakka Curry/ Biitergourd with Yogurt
I am hoping to entice the guests at the Weekend Herb Blogging, the event created by Kalyn's Kitchen, to go beyond the norm and try South Indian food. This week of WHB is hosted by Ruth at Once Upon a Feast.
Bitter gourds are very popular in Asia and most people either like it immensely or dislike it unreasonably. As you can see, I fall into the former category, hoarding bitter gourd recipes in every form and taste. Bitter gourd or bitter melon is highly regarded for its medicinal properties in Asia but is slow in getting recognition in the Western World.
This curry made with bitter gourd, yogurt and coconut milk tastes best with rice with a stir fried vegetable and fried fish on the side.
You will need:
Bitter gourd- 2 big ones.
Green Chilies- 5 vertically slit
Tomato- 1 small one cut into 4 pieces
Onion- 1 small one sliced
Red chili powder-3/4 tsp
Turmeric- 1/4 tsp
Coriander Powder(Dhania)-1tsp
Coconut Milk Powder- 5 tbsp mixed with 1 cup water (or 1 cup coconut milk)
Yogurt- 1cup
Salt to taste
Oil- 2 tbsp
For seasoning:
Mustard seeds- 1/2 tsp
Cumin (Jeera)-1tsp
Curry leaves- 1 sprig
Canola oil-1 tbsp
Preparation:
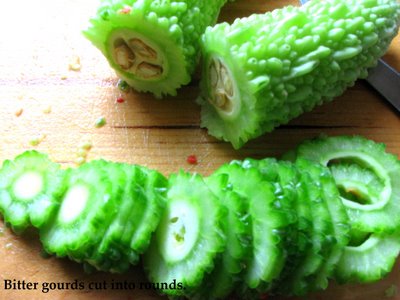
1. Scrape the outer projections on the bittegourd and slice the bitter gourd into thin rounds. Sprinkle with ½ tsp salt and 1 tbsp yogurt and let it sweat for 10 minutes. Squeeze the pieces and wash them well to remove extra salt and the bitterness. If you like the bitterness, skip this step. If you are using Chinese bittter gourd or bitter melon, which is light green and bulbous in shape, it is not as bitter so you can directly fry it.
2. Heat 2 tbsp of oil and shallow fry the bitter gourd rounds on medium heat till slightly crisp. Not very crisp. Then add the onions and green chilies and sauté for a couple of minutes.
3. Lower the heat and add the chili powder, coriander powder, turmeric and 1 tablespoon water. Fry for a while till the powders get cooked and then add the tomato and salt. Cook for a minute and add ½ cup water and 1 cup coconut milk. If the coconut milk is thin, then reduce the quantity of water. Vary the quantity of chili powder and green chilies as per taste. My recipes tend to be on the slightly spicier side, so be warned.
4. Check the salt and liquidity of the curry and add more salt and water if needed. Take it off the flame and do not let it come to a full boil. After it cools down, add 1 cup beaten yogurt.
5. Tempering: Heat the oil in a small wok/pan and as it heats up, add mustard seeds and cover till it tops sputtering.Reduce the heat and add the curry leaves and cumin. Pour the flavored oil over the curry.
Serve with hot steamed white rice.
Labels:
Bittergourd,
Kerala,
Malabar,
Vegetable Curries
October 02, 2006
JFI-Thari Kanchi/Rava Payasam
Thari Kanchi is not a kanchi(gruel or porridge) at all. It is a light sweetened hot drink made from milk with very little semolina and seasoned with nuts and raisins. Traditionally had while breaking the fast in the evening, it is supposed to settle the stomach. It also eases the cramps that arise from the sudden rush of food after a day of abstinence from any food and water.
Semolina (also known as Farina here) is known to be easily digestible and is given to kids as porridge. Though this drink, once seasoned with ghee(clarified butter) and nuts, is nowhere near the lumpy porridge.
Try it once and you may end up making it all through winter.Nothing like wrapping your cold hands around a steaming mug. Omit the shallots in the seasoning if you cannot bend your mind around it or if you cannot find it. It does add a characteristic taste and texture but try it either way.
This is my entry for JFI-Ghee & Butter being hosted by Cooking Medley!
You will need: For 4-5 servings
Farina/Semolina/Sooji/ Rava- 2 tbsp
Milk- 2 1/2 cups
Water- 1 ½ cup
Sugar-4 tbsp
Cardamom- ½ tsp powdered
Seasoning:
Ghee/Clarified Butter- 1 tbsp
Only Tiny Red Shallots- 1 finely chopped
Cashew nuts- 3-4 chopped
Raisins- 5-6
Preparation:
Combine the milk with water, bring it to a boil and add sugar. To this, add the rava/sooji and sugar. Simmer on low heat for 5-8 minutes, until everything merges well and the semolina cooks. Be careful not to let it boil over. Add the cardamom powder and add more sugar if needed. Take the mixture off the flame and let it absorb the flavors. The mixture should be the consistency of a watery shake/smoothie.
Seasoning: Heat ghee in a pan, and sauté the cashew nuts, raisins and shallots on low heat till they turn golden and remove from fire and pour over the milk mixture..
P.S. The water is added to regular full fat milk to thin it. If using low fat or fat free milk, use full 4 cups milk. There is no need to use water.
The drink will thicken after some time, so do not add too much semolina considering the drink to be too thin. If later it does turn too thick, just simmer it with more milk.
Do not try to use onions or any other kind of shallots or frozen shallots as substitute.
Subscribe to:
Posts (Atom)